How to Boot a XenServer VM into Recovery Mode

Recovery Mode can be helpful if you need to do certain task like operate on the VM with the disk unmounted or you need to reset a root password.

All of the following is done through XenCenter

To boot the VM into recovery mode all you have to do is

  1. Shutdown the VM
  2. Insert boot media i.e. (DVD, cd, iso image, etc.) into DVD Drive 1:
  3. Start VM in Recovery Mode.  In the main menu click on VM –> Start/Shut Down –> Start in Recovery Mode

When the VM boots up it will boot off of whatever is in DVD Drive 1.


XenServer Unable to Import OVF

Check to see if you have an import template.

In the Main Menu click “View” and check “Hidden Objects”, in the Server View you should see a Template named something like “XenServer Transfer VM 6.2.0-123456c (hidden)”

If you don’t have one, then run the following command on the XenServer to create a template.

/opt/xensource/packages/files/transfer-vm/install-transfer-vm.sh

If the command fails double check that you have a default storage repository selected and try again.

Once the template is created import the OVF.

How to Create a Local Storage Repository for XenServer

Find your hard drive and or partition.

cat /proc/partitions

The above command should give you a list of all the HDD’s and partitions on the system.

Find the UUID of the disk with the following command

ll /dev/disk/by-id

Find the UUID of your XenServer.

xe host-list

Create the storage repository.

 xe sr-create content-type=user device-config:device=/dev/disk/by-id/"Disk UUID" host-uuid="Host UUID" name-label=”Local Storage 2” shared=false type=lvm

example:

[root@XenServer ~]# cat /proc/partitions
major minor #blocks name

3 0 22378 loop0
6 0 285474816 sda   <--- Main HHD is is here, shows total size of disk
8 1 4193297 sda1 
8 2 4193297 sda2       
8 3 244085167 sda3  <--- This is the partition we need
252 0 4096 dm-0
252 1 105070592 dm-1
253 0 104857600 tda
253 1 4363264 tdb
[root@XenServer ~]# ll /dev/disk/by-id/
total 0
lrwxrwxrwx 1 root root 9 Oct 13 20:38 scsi-56234c232c92f371217ce8549f51e0nf1 -> ../../sda
lrwxrwxrwx 1 root root 10 Oct 13 20:38 scsi-56234c232c92f371217ce8549f51e0ff1-part1 -> ../../sda1
lrwxrwxrwx 1 root root 10 Oct 13 20:38 scsi-56234c232c92f371217ce8549f51e0ff1-part2 -> ../../sda2
lrwxrwxrwx 1 root root 10 Oct 13 20:38 scsi-56234c232c92f371217ce8549f51e0ff1-part3 -> ../../sda3   <-- This is the UUID for the partition
lrwxrwxrwx 1 root root 9 Oct 13 20:38 usb-Dell_Virtual_CDROM_1028_123456 -> ../../sr1
[root@XenServer ~]# xe host-list
uuid ( RO)                : dce4e7fe-8342-bd11-12c8-83caac124a4b   <--- UUID for XenServer
          name-label ( RW): XenServer001
    name-description ( RW): Default install of XenServer

[root@XenServer ~]# xe sr-create content-type=user device-config:device=/dev/disk/by-id/scsi-56234c232c92f371217ce8549f51e0ff1-part3 host-uuid=dce4e7fe-8342-bd11-12c8-83caac124a4b name-label="Local Storage" shared=false type=lvm

 

How to export/import a XenServer VM from the Command Line

We can list the VM’s by running

xe vm-list

You can export a VM using either the name of the VM or by using the uuid.  The above command list both so you can use which ever one you want.

You will also need to shutdown the VM your going to export.

xe vm-shutdown vm=ubuntu

Export by Name
The name of the VM is”ubuntu”.

xe vm-export vm=ubuntu filename=/backup/ubuntu.xva

Export using uuid

xe vm-export uuid=b24dcd65-5e12-4576-2f39-46ecab9362ab filename=/backup/ubuntu.xva

Importing VM

xe vm-import vm=centos5 filename=/backup/ubuntu.xva

How to add a NFS ISO Repository to XenServer

This assumes you have a NFS Share setup up.  If you do not you can follow this link.

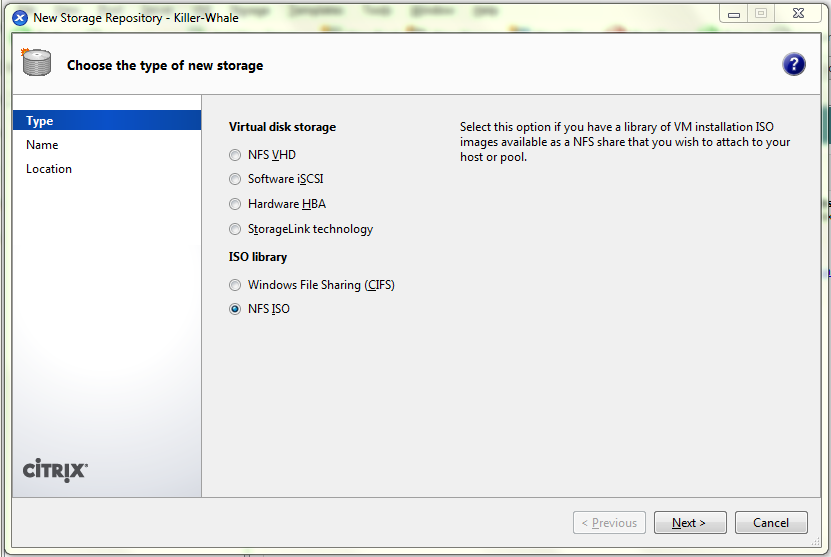
Open up XenCenter click on add storage device button on the top.

Select NFS iso and hit next.

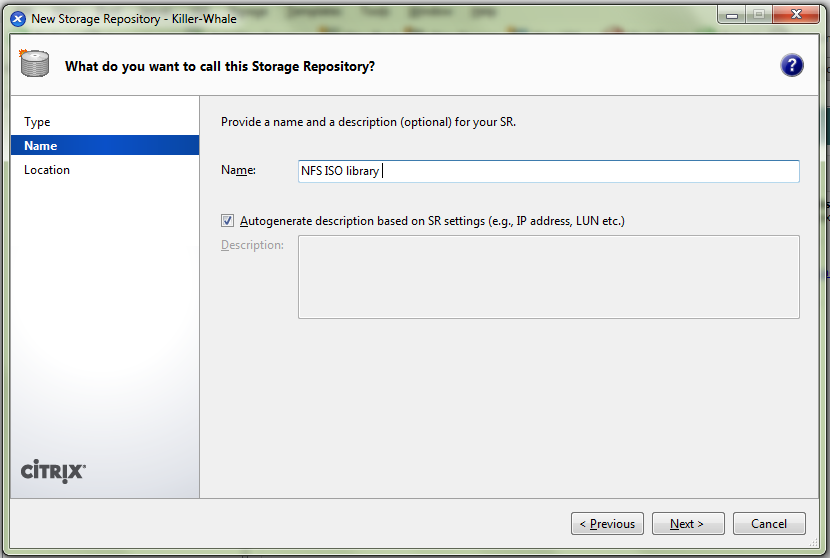
Connect XenServer to NFS

Enter in the name you want to call your repository
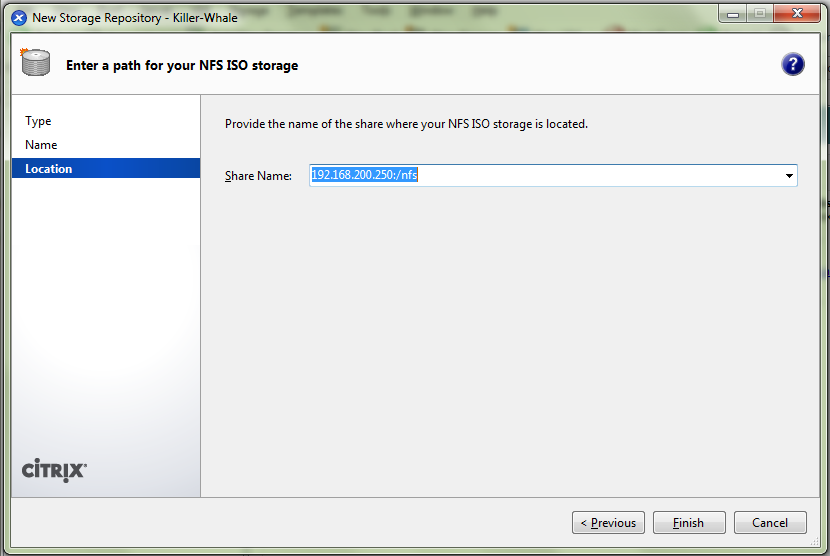
Connect XenServer to NFS 2

Next we add the share location which in my case is 192.168.200.250:/nfs  and hit Finish.

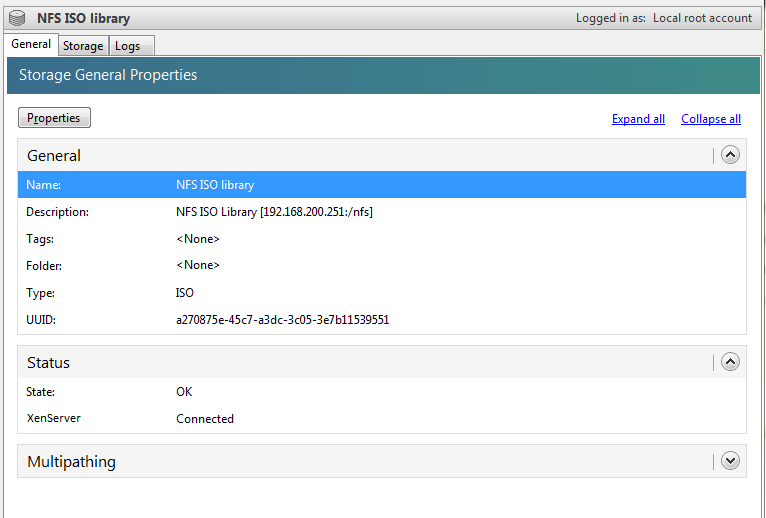
Connect XenServer to NFS 3

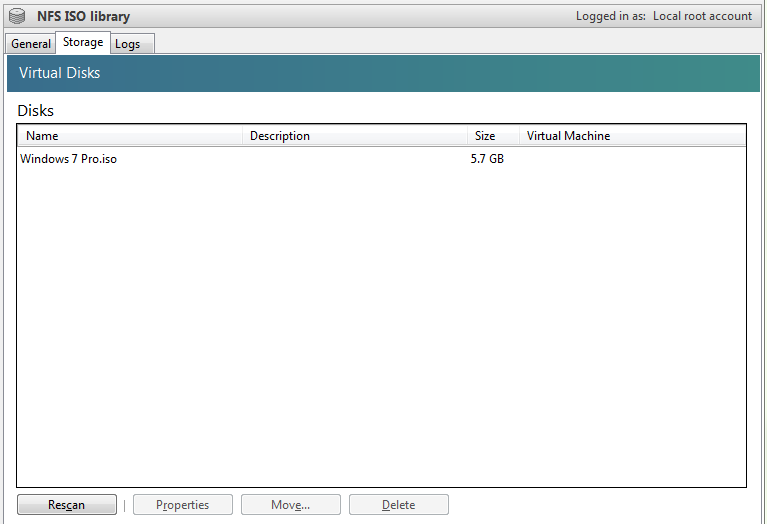
If all went well you should have a new NFS ISO repository

Connect XenServer to NFS 5

Connect XenServer to NFS 6


How to Install XenServer Tools on Linux

This assumes you are connected to your XenServer with XenCenter.  First you need to mount the xs-tools.iso on the system.  To do this right click on the VM you want to install XenServer Tools on and click “Install XenServer Tools”

Then from the console tab do the following as the root user, or just type sudo before each command

mkdir /mnt/xs-tools
mount /dev/cdrom /mnt/xs-tools
cd /mnt/xs-tools/Linux/
bash install.sh

After it finishes, you need to reboot.