UniFi UNVR – Recover from Failed USB Drive

Some of the UniFi UNVR’s have system files on a USB drive. There seem to be a number of the drives failing recently, rendering the UNVR inoperable. Fortunately it is easy to replace. The following steps should preserve the video recordings.

https://community.ui.com/questions/UNVR-stopped-responding-just-white-flashing-light/a051f869-8349-4a2a-a72a-ce3a8aa8c759

Steps to recover UNVR

  1. Power off the UNVR
  2. Remove the USB drive (use a heat gun or screw driver to break the glue that is holding the USB drive)
  3. Install new USB drive
  4. Temporarily remove UNVR HDDs (this may not be necessary, but rather be safe then sorry.)
  5. Boot UNVR with new USB drive. (Give it a little time to format and copy contents to the new USB drive. Should not take more then 30 minutes.)
  6. Setup the UNVR like it was before
  7. Power off the UNVR again
  8. Reinstall the HDD’s
  9. Power on the UNVR
  10. Log in and reconfigure the users

Note on Recovery

You could potentially mount the failed or failing USB drive on a Linux machine copy off a UniFi backup. Unfortunately, the UniFi Protect backup does not preserve the users. Just the video groups. You will probably have to resend invites to users.

Note on the video storage drives

It sounds like the UniFi Protect system will try to read the drives and if it can preserve the data or read the raid information it will try to use that. That is what it sounds like at least from the forums. More info on drive management.

https://help.ui.com/hc/en-us/articles/360037340954-UniFi-Hard-drive-compatibility-and-management#h_01F8QE56P7EY1P9FMTZHFZD463

Change UniFi User Password from Command Line

  1. SSH into the UniFi server
  2. Connect to MongoDB
  3. Find user ObjectId
  4. Update user info with new Password

You will need a hash of the password to put into the database. We don’t cover that in this post. You could copy the password from a different user account or use a different UniFi instance to change the password and then check the DB to find the hash.

SSH into the UniFi Server

ssh unifiadmin@unifiserver

Connect to MongoDB

Connect to Mongo by typing in the following.

mongo -port 27117

Then select the ace database by typing

use ace

Find user ObjectId

The admins are in the admin collection/table. Use the following command to list all the users and their name, email, and password hash.

db.admin.find({ }, { name:"" , email : "", "x_shadow" : "" })

Update user info with new Password

The following looks complex. Fortunately though you should be able to copy and paste. You should only need to change the
– ObjectId to your User Id
– Password Hash to your password hash

db.admin.update({"_id" : ObjectId("223abc5489de0a93be758493")}, {$set: { "x_shadow" : "$6$nwpi7.q2$OuD9/UZGZt5cD739Dt7j8Gb1uPtfU99p0DeDSurSNBZVizieUrFVFbRufiZMgOk2IaaDZN9BVmL9yUwQ2mC8f."}});

Note: The hash above is password. Not recommended for use.

You should receive a confirmation that it succeeded. Test the new password by logging into the UniFi Controller.

For more MongoDB commands, check out this post.

Extract UniFi .unf backup file

In this post we are going to extract the contents of a UniFi .unf backup.

This is helpful if we need to do any sort of recovery, or need to look through the database to find system information.

  1. Acquire backup
  2. Decrypt and extract backup
  3. Dump database to JSON file

Acquire Backup

This is easy to do. Log into the web interface go to Settings -> System -> Maintenance -> Backup and Restore

Scroll down to Available Backups and download.

Download Backup in UniFi Controller

You can also get the file via scp or sftp. Manual backups are located in

/usr/lib/unifi/data/backup

and auto backups are in

/usr/lib/unifi/data/backup/autobackup

Decrypt and Extract Backup

We’ll be getting the following decrypt script from here. https://github.com/zhangyoufu/unifi-backup-decrypt More notes on it below.

We’ll need to make sure that openssl and zip are installed

sudo apt install openssl zip

Download the script with wget

wget https://raw.githubusercontent.com/zhangyoufu/unifi-backup-decrypt/master/decrypt.sh

Make it executable

sudo chmod u+x decrypt.sh

And now we can convert the UniFi .unf backup file to a .zip

sudo ./decrypt.sh autobackup_6.2.33.unf autobackup_6.2.33.zip

Now we can extract the zip archive. You can do this on Windows, macOS, or Linux through the GUI or you can extract with

sudo unzip autobackup_6.2.33.zip -d unifi

This will extract all the files and folders to a directory named unifi.

cd unifi

Dump database to JSON

You should now see the db.gz file. This is a compressed archive of the database in BSON (Binary JSON) format. We can use the mongo-tools to convert this to a more human readable JSON format.

sudo apt install mongo-tools

Now we can extract the archive and pipe it through bsondump.

gunzip -c db.gz | bsondump

You can run it through grep to filter out what you need.

You can also dump the db to a json file with

bsondump --bsonFile=db --outFile=db.json

More notes on the decrypt script.

The decrypt script is really simple. It looks like it uses a key to decrypt the UniFi backup and then puts all the contents into a zip file. There is also an encryption script. Theoretically you can decrypt, make changes to the config and then reencrypt and restore to a server.

#!/bin/sh

# Authors:
# 2017-2019 Youfu Zhang
# 2019 Balint Reczey <balint.reczey@canonical.com>

set -e

usage() {
    echo "Usage: $0 <input .unf file> <output .zip file>"
}

if [ -z "$2" -o ! -f "$1" ]; then
    usage
    exit 1
fi

INPUT_UNF=$1
OUTPUT_ZIP=$2

TMP_FILE=$(mktemp)
trap "rm -f ${TMP_FILE}" EXIT

openssl enc -d -in "${INPUT_UNF}" -out "${TMP_FILE}" -aes-128-cbc -K 626379616e676b6d6c756f686d617273 -iv 75626e74656e74657270726973656170 -nopad
yes | zip -FF "${TMP_FILE}" --out "${OUTPUT_ZIP}" > /dev/null 2>&1

UniFi-Video Service failing to Start

Do note that the UniFi-Video software is no longer supported should be migrated to the UniFi Protect systems.

Running “systemctl status unifi-video” gives the following error.

(unifi-video) checking for system.properties and truststore files…
…fail!

It appears that the error is due to an unsupported version of Java. Installing an older version of Java resolves the issue.

You can check which versions of Java are available with

apt-cache show openjdk-8-jre

The versions that showed up for me were

8u282-b08-0ubuntu1
8u252-b09-1ubuntu1 

Installing the last one fixed the issue for now.

sudo apt-get install openjdk-8-jre-headless=8u252-b09-1ubuntu1

https://old.reddit.com/r/Ubiquiti/comments/l30jm5/unifi_video_31013_not_compatible_with_openjdk_180/

Unable to Remove Authorized SSH Keys from AirOS

For some reason I ran into an issue where I can not remove authorized SSH Keys in AirOS version 6.3. It redirects to a 404 page and then to the main page.

Attempting to remove SSH keys in AirOS
404 Error while attempting to remove SSH keys

Thankfully, we can still remove the authorized keys from the command line. For more information on making changes over SSH, refer to the following post.

SSH into radio. Replace username and IP address with your radios user and IP.

ssh ubnt@192.168.1.20

Open up config file

vi /tmp/system.cfg

Search for the lines that contain

the sshd.auth.key and remove them

Remove the sshd.auth.key lines

Save the file and write the configuration with

/usr/etc/rc.d/rc.softrestart save

Once the command completes, you should be good to go.

Ubiquiti U Installer Screenshots and Configuration Interface

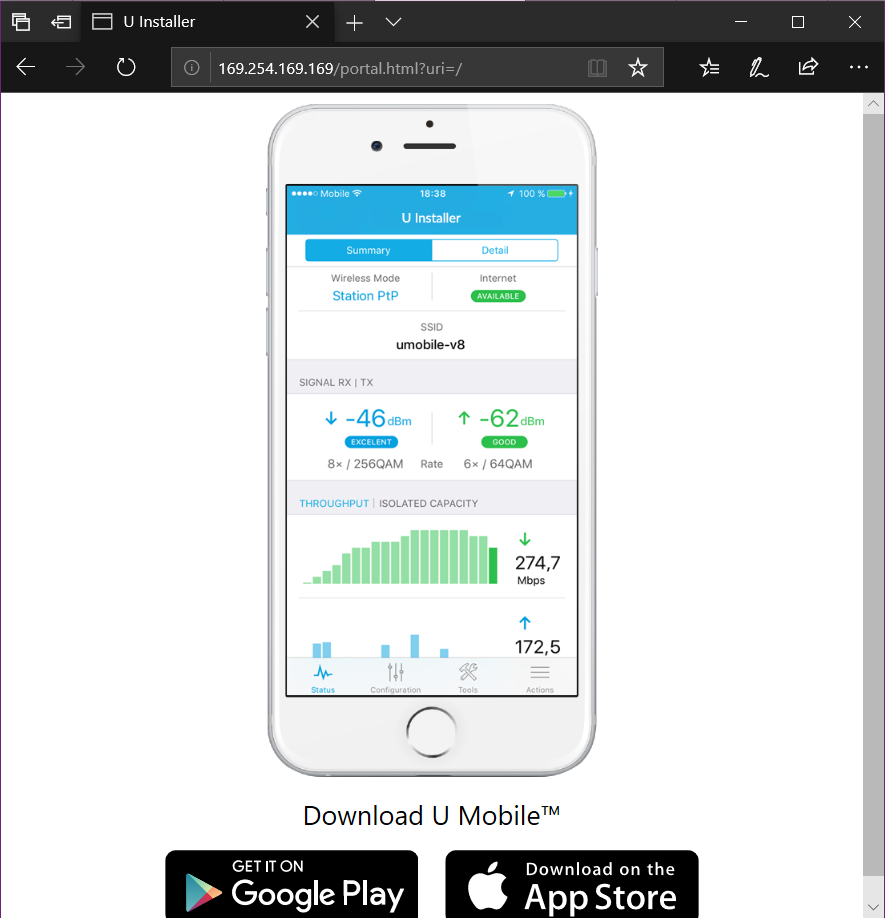
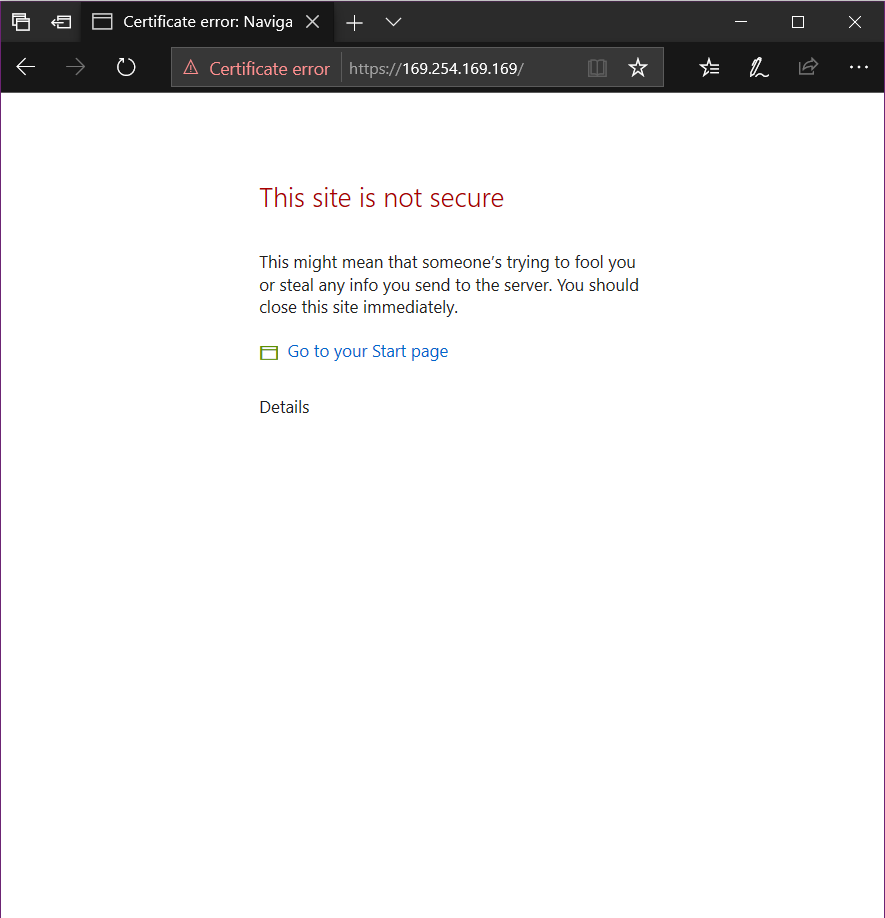
By default the U Installer redirects you to a page asking you to download the app. You can get to the actual U Installer web page by going to https://169.254.169.169

Default U Installer Page
Access U Installer Certificate Error

It has the same interface as a regular Airmax M equipment.

U Installer main page

Notes on Migrating UniFi-Video NVR Disk

Recently upgraded a UniFi-Video VM by creating a new VM and restoring the backup from the previous one. There was a separate virtual disk used for storing all the videos. Although once I reattached it, I had to change the owner to the unifi-video user. lt was reporting that the owner/group was 127 and 134, looks like that was the user ID from the previous VM.

Example output from ls -hla command

drwxr-xr-x 3 127 134 4.0K Jan 16 2020 176de761-8399-3bed-8ceb-917cbe4d25bd
drwxr-xr-x 2 127 134 4.0K Sep 10 12:28 21d506ef-dded-31f2-baf8-c109a7e653b9
drwxr-xr-x 4 127 134 4.0K Jan 1 2020 1a3afc4c-a030-39a1-b139-857444c8b71c

Ended up changing the owner to the unifi-video owner with the chown command. /path/to/videos is the mount point of the video drive.

chown -R unifi-video:unifi-video /path/to/videos

Configuring UFW Firewall on Ubuntu for UniFi and UniFi-Video

You should be able to copy and paste all the following commands in. You can check the status of the commands after with

sudo ufw status

Allowing access to UniFi ports

sudo ufw allow 3478/UDP
sudo ufw allow 5514/UDP
sudo ufw allow 8080/TCP
sudo ufw allow 8443/TCP
sudo ufw allow 8880/TCP
sudo ufw allow 8843/TCP
sudo ufw allow 6789/TCP
sudo ufw allow 27117/TCP
sudo ufw allow 10001/UDP
sudo ufw allow 1900/UDP

UniFI Video ports

sudo ufw allow 7080/TCP
sudo ufw allow 7443/TCP
sudo ufw allow 7445/TCP
sudo ufw allow 7446/TCP
sudo ufw allow 7447/TCP
sudo ufw allow 10001/UDP
sudo ufw allow 6666/TCP
sudo ufw allow 7004/UDP
sudo ufw allow 7442/TCP

Helpful links

https://help.ui.com/hc/en-us/articles/217875218-UniFi-Video-Ports-Used
https://help.ui.com/hc/en-us/articles/218506997-UniFi-Ports-Used

Change UniFi Camera Password from Command Line

Basic steps are

  • Change password with passwd
  • Copy passwd hash to /tmp/system.cfg
  • Apply Changes

Changing Password with passwd

The passwd command is normally used for changing the password for a Linux user. We’ll use it to change our user password and then copy the hash out of the /etc/passwd file to use in the Ubiquiti config file.

UVC.v4.18.37.67# passwd
Changing password for admin
New password:
Retype password:
passwd: password for admin changed by admin
UVC.v4.18.37.67#

Copy passwd hash to /tmp/system.cfg

Using “cat /etc/passwd”, we can get what the new password hash is and can copy that into the /tmp/system.cfg file.

UVC.v4.18.37.67# cat /etc/passwd
admin:$6$K4VfN1jGcxaX63Eo$yMGBg7jgCCg.HorkmkQf9wnQcEko.1onZcAa6ua421LonYgfYr8FgHprrwkMqaTYzH0KqCtOEPqDlB3AvkvcW.:0:0:Administrator:/etc/persistent:/bin/sh
UVC.v4.18.37.67#

Open up the /tmp/system.cfg config file, find the section below and replace the hash part, i.e. the part that is in bold.

users.1.name=admin
users.1.password=$6$K4VfN1jGcxaX63Eo$yMGBg7jgCCg.HorkmkQf9wnQcEko.1onZcAa6ua421LonYgfYr8FgHprrwkMqaTYzH0KqCtOEPqDlB3AvkvcW.
users.1.status=1

As a side note, you can copy and past all of the “users.1.*” lines and change the 1 to 2 and have a second user.

Apply Changes

You can use the following command to write the changes and then reboot the camera.

cfgmtd -f /tmp/system.cfg -w && reboot

Long Example

[admin@localhost ~]$ ssh ubnt@10.96.1.91
ubnt@10.96.1.91's password:
BusyBox v1.29.2 () built-in shell (ash)
UVC.v4.18.37.67# passwd
Changing password for admin
New password:
Retype password:
passwd: password for admin changed by admin
UVC.v4.18.37.67# cat /etc/passwd
admin:$6$K4VfN1jGcxaX63Eo$yMGBg7jgCCg.HorkmkQf9wnQcEko.1onZcAa6ua421LonYgfYr8FgHprrwkMqaTYzH0KqCtOEPqDlB3AvkvcW.:0:0:Administrator:/etc/persistent:/bin/sh
UVC.v4.18.37.67# vi /tmp/system.cfg <- Edit the text file and replace the hash with the one from above
UVC.v4.18.37.67# cfgmtd -f /tmp/system.cfg -w && reboot

Upgrade AirFiber 11 to 4.1 from SSH

https://help.ui.com/hc/en-us/articles/204977444-airFiber-Updating-the-Firmware

Quick list of commands

ssh ubnt@192.168.1.20  <- Replace with username and IP address
cd /tmp
wget http://dl.ui.com/firmwares/airfiber11X/v4.1.0/AF11.v4.1.0.bin
mv AF11.v4.1.0.bin fwupdate.bin
/sbin/fwupdate -m
  1. Upload the firmware using FTP or SCP to the /tmp directory
  2. Rename the file from AF11…bin to fwupdate.bin
  3. Start the upgrade with
/sbin/fwupdate -m

Wait for it to finish upgrading