Directory Traversal – Burp Suite

Here are a couple different ways to do directory traversal.

More detailed information is available at the following site.
https://portswigger.net/web-security/file-path-traversal

  1. Normal directory traversal
  2. URL Encoding
  3. Getting around applications that strip directory traversal sequences
  4. Using a null byte

Directory Traversal

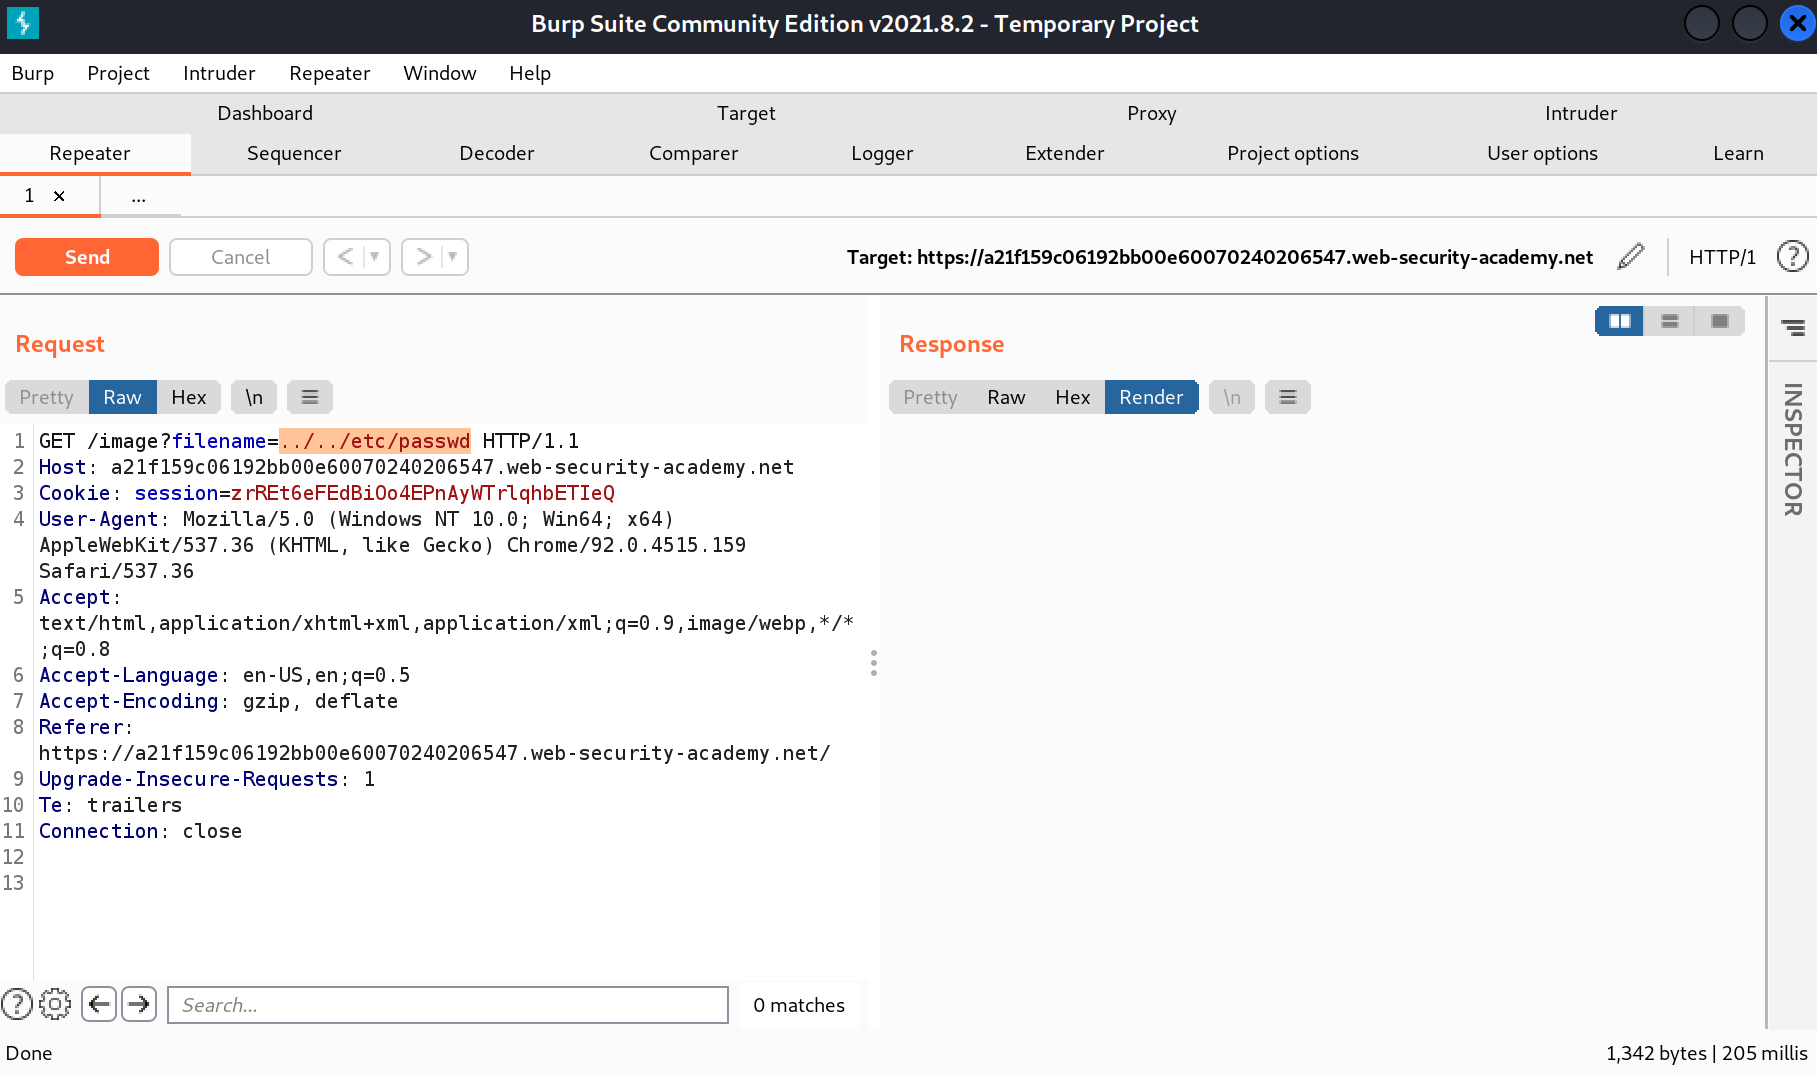
What exactly is directory traversal anyway? Well, it is pretty much exactly what it sounds like. We traverse directories by manipulate the file path, for something like an image, to get something more valuable like the passwd file.

In it’s most basic form, we can add ../../../../../etc/passwd to a file path and instead of pulling an image, we get the passwd file.

For instance, if we load an image on a website, it’s file path on the server may be something like /var/www/html/image.png. If we right click on an image and open in a new tab and inspect the URL, we can see this path. “Note: Web servers have a root directory for all the website files. Generally web files’ root starts there not / root of the machine.”

Now if we remove image.png and replace it with ../ (../ on Linux/macOS or ..\ on Windows) we’ll go backwards one directory. String them together and we can go back to the root of the drive. Then we can add /etc/passwd (Or replace with whatever file we want) and load the contents of that file.

Most web applications should have some sort of protections in place to guard against directory traversal. Let’s go over a few ways to get around it.

URL Encoding

URL encoding sometimes can work and is simple to do. In Burp, select the file path, right click, Convert selection -> URL -> URL-encode all characters.

You can also try double encoding. Encode once, select the encoded text and encode again.

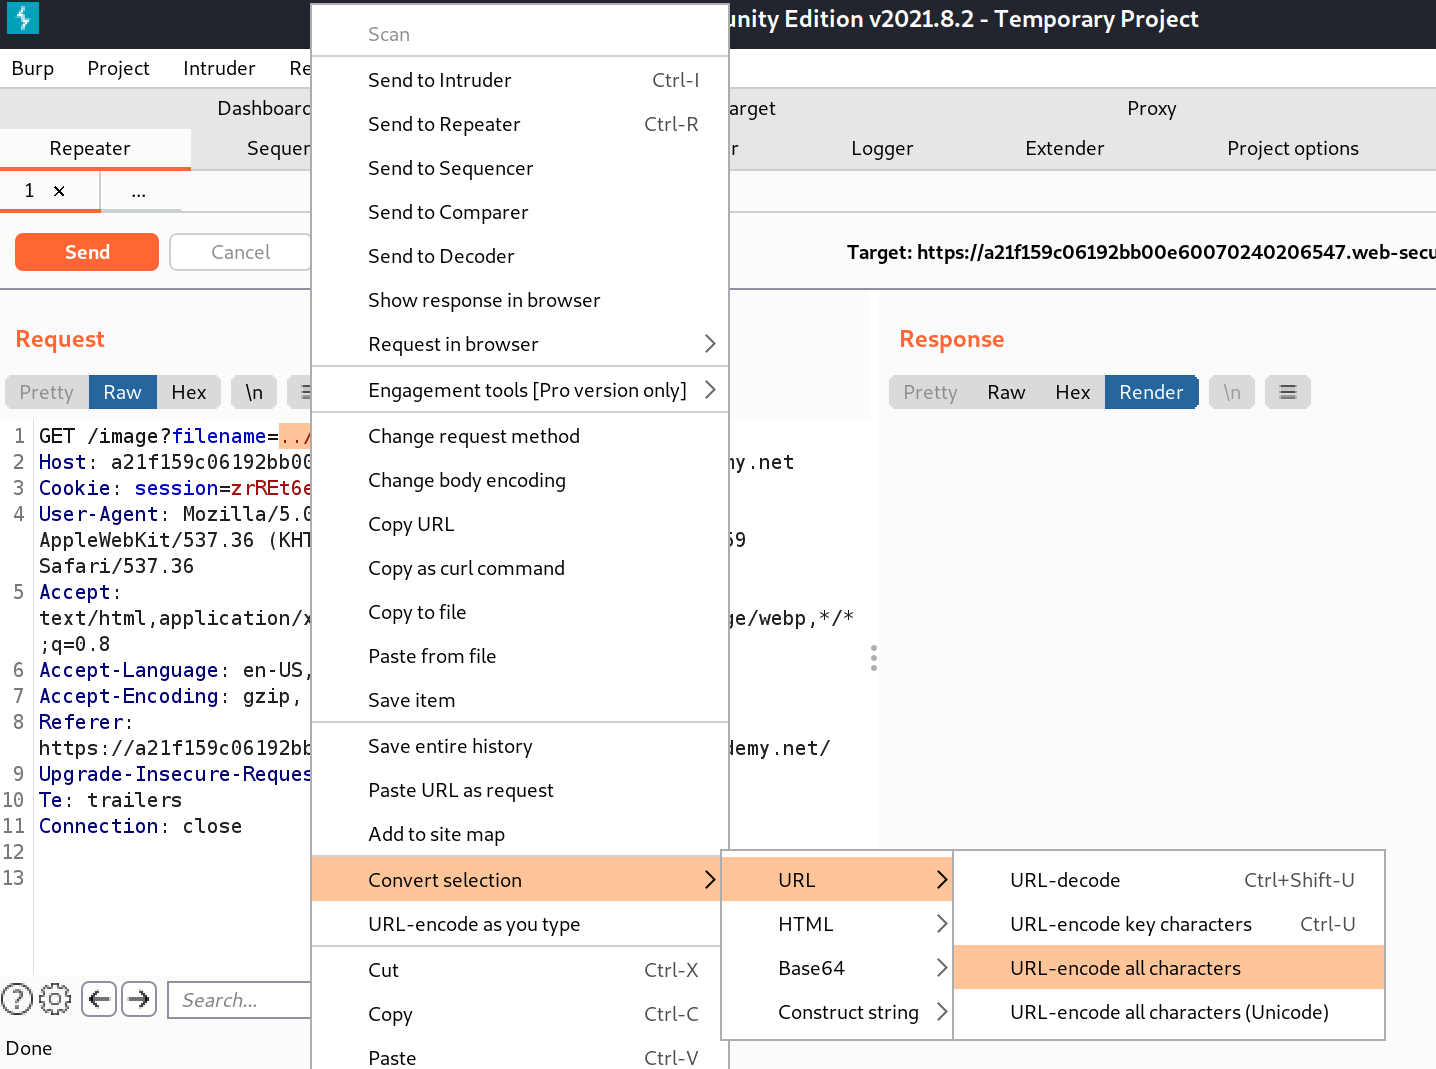
In the above screenshots, ../../etc/passwd becomes “%25%32%65%25%32%65%25%32%66%25%32%65%25%32%65%25%32%66%25%36%35%25%37%34%25%36%33%25%32%66%25%37%30%25%36%31%25%37%33%25%37%33%25%37%37%25%36%34”

Getting around applications that strip directory traversal sequences

Sometimes the web app can strip out text that it knows is directory traversal characters/sequences. For instance, it sees ../ in the requested url and just strips it out.

We can do something like the following sequence to get around it.

....//....//etc/passwd

That is 4 periods, followed by 2 slashes. What happens is the web app reads the URL, goes hey ../ is not allowed, bye bye! Removes the two instances of ../ and forwards the URL on. Which ends up being

../../etc/passwd

Which is just perfect for our use case.

Using a Null Byte

If the application is using the file extension to validate that an image or other file is loaded, instead of say passwd, we can try using a null byte. A null byte is used to terminate a string.

../../etc/passwd%00.png

What can end up happening is the web application sees the .png or .jpg at the end and goes “oh that is a valid extension, carry on” and then the system reads the line and sees the null byte and says “Oh null byte! end of file path, here is your file.”

Hydra – Socket error: Connection reset by peer

[VERBOSE] Disabled child 2 because of too many errors
[VERBOSE] Disabled child 6 because of too many errors
[ERROR] could not connect to target port 22: Socket error: Connection reset by peer
[ERROR] could not connect to target port 22: Socket error: Connection reset by peer
[ERROR] could not connect to target port 22: Socket error: Connection reset by peer
[ERROR] could not connect to target port 22: Socket error: Connection reset by peer
[ERROR] ssh protocol error

Looks like the issue can happen if you have too many threads going at once. Lower the amount of threads your using with -t. Recommended amount for ssh is 4.

hydra -L usernames.txt  -P "passwords.txt" 192.168.1.20 ssh -t4

Hashcat examples

Rule based attack

Use a wordlist and best64 rules to try and crack a wordpress hash. Using rockyou.txt as an example.

-m Specifies the hash type

hashcat -m 400 wordpress.hash -r rules/best64.rule wordlist/rockyou.txt

wordpress.hash is a text file that contains the password hash. You can list multiple hashes in the file

Example contents of file

bob@localhost:~$ cat wordpress.hash 
$P$BeJ2ZWVgSx/rR8ifcTFyjq1ouCCWwu0
bob@localhost:~$

Brute force

Attempt every 8 numeric combination for a WPA2 key.

hashcat -m 2500 -a3 capture.hccapx ?d?d?d?d?d?d?d?d

Hashcat built in Charsets

You can swap out the ?d from the above command with any of the built in character sets below.

  ? | Charset
 ===+=========
  l | abcdefghijklmnopqrstuvwxyz
  u | ABCDEFGHIJKLMNOPQRSTUVWXYZ
  d | 0123456789
  h | 0123456789abcdef
  H | 0123456789ABCDEF
  s |  !"#$%&'()*+,-./:;<=>?@[\]^_`{|}~
  a | ?l?u?d?s
  b | 0x00 - 0xff

More information
https://hashcat.net/wiki/doku.php?id=cracking_wpawpa2
Rule based attacks are recommended
https://hashcat.net/wiki/doku.php?id=rule_based_attack

Unable to access old HTTPS login for WiFi router

Part of the reason some of the older sites do not work is due to insecurities in older SSL protocol’s. Some of the older versions are disabled in newer browsers thereby keeping someone from accessing the device.

Unsupported protocol

Work Around

Internet Explorer will let you change the security settings to allow older security protocols to work. Chrome and Firefox seem to have issues letting you do that.

Open Internet Explorer and then go to the Internet Options and find the Advanced tab. Scroll down and locate the “Use SSL3.0” option and enable it.

Enable SSL 3.0

You may also need to modify the Zones.

Change Internet Zones

You should now be able to accept the Security Certificate and log in.

Proceed to login page for site

This should only be done if absolutely needed and only on sites you trust. It would be a good idea to change the settings back when finished.

More info.
https://community.spiceworks.com/topic/1958251-just-purchased-a-sonicwall-via-ebay-but-after-doing-the-initial-config

Check if Mikrotik is an Open DNS Resolver

https://www.openresolver.com

You can test if a router is acting as an open DNS resolver by running the following command from a Linux terminal. If you need to install dig, refer to here for Debian/Ubuntu and here for RPM/CentOS/Fedora Distros.

Replace 192.168.88.1 with the host you want to test against.

dig +short test.openresolver.com TXT @192.168.88.1

If you receive the following

"open-resolver-detected"

The router is acting as an open resolver.

If you get

;; connection timed out; no servers could be reached

Then you are unable to use that router to resolve DNS.

Example running the command against a Mikrotik router with Remote DNS turned on Then adding a firewall rule to block unwanted request.

bob@localhost:~$ dig +short test.openresolver.com TXT @192.168.88.1
"open-resolver-detected"
bob@localhost:~$ 
<<-- Put firewall rule on router -->>
bob@localhost:~$ dig +short test.openresolver.com TXT @192.168.88.1
;; connection timed out; no servers could be reached  
bob@localhost:~$ 

Extra notes

If you have firewall rules allowing your IP address to use the router for DNS, then the above command to test will show it as an Open Resolver. Ideally you would want a connection from the outside to test. Or you can use this link and test it from the website. https://www.openresolver.com

OpenVas set password for user

After installing OpenVAS you may need to setup a user. Running the following command will create the user admin and will print the password for the user below.

openvasmd --create-user admin

Example output.

User created with password 'b4539967-c521-fe41-d255-aeb53e735h9a'.

If needed you can delete a user with the following command

openvasmd --delete-user=USERNAME