The dig command is apart of the bind-utils package. You can install it with.
sudo yum install bind-utils -y
Now run dig
dig localhost

The dig command is apart of the bind-utils package. You can install it with.
sudo yum install bind-utils -y
Now run dig
dig localhost
Download the correct package for your distribution of Linux from
https://teams.microsoft.com/downloads
You should be able to open the installer and it should install, if not you can run the following commands from a terminal
The install instructions are for Debian/Ubuntu/Linux Mint.
Install using dpkg
sudo dpkg -i Downloads/teams_1.2.00.32451_amd64.deb
Launch Teams by typing
teams
Or you can launch it from your Applications Menu
After Teams is installed and launched, sign in to your Microsoft account.
You can have dd show the progress of a write by specifying “status=progress” in the command line arguments.
sudo dd if=Downloads/CentOS-8-x86_64-1905-boot.iso of=/dev/sdb status=progress
Example:
bob@localhost:~$ sudo dd if=Downloads/CentOS-8-x86_64-1905-boot.iso of=/dev/sdb status=progress
559690240 bytes (560 MB, 534 MiB) copied, 96 s, 5.8 MB/s    <-- This is shown while writing.
1093632+0 records in
1093632+0 records out
559939584 bytes (560 MB, 534 MiB) copied, 96.0339 s, 5.8 MB/s
There are a few different ways to find out the system up time in Linux.
admin@localhost [~]# cat /proc/uptime
 306350.37 2218975.63
admin@localhost [~]#
Taking the above command one step further, we can run it in the date command to see the system start up date.
date --date="cat /proc/uptime | awk '{print $1}'seconds ago"
[admin@localhost ~]$ uptime
  6:25AM  up 2 days,  6:24, 3 users, load averages: 0.00, 0.00, 0.00
[admin@localhost ~]$
[admin@localhost ~]$ w
  6:27AM  up 2 days,  6:25, 2 users, load averages: 0.00, 0.00, 0.00
 USER             TTY      FROM              LOGIN@  IDLE WHAT
 admin       p1       localhost.  6:09AM    13 su (bash)
 admin       p2       localhost.  6:25AM     - w
[admin@localhost ~]$
Reference links
https://sharadchhetri.com/2013/03/18/4-different-commands-to-find-system-uptime-in-linux/
Find active screens with
xrandr | grep " connected"Example output
HDMI-0 connected 1920x1080+0+0 (normal left inverted right x axis y axis) 527mm x 296mm
eDP-1-1 connected primary 1920x1080+0+0  (normal left inverted right x axis y axis) 294mm x 165mm
Set desired screen brightness. Range is from 0-1
xrandr --output eDP-1-1 --brightness .5You can print a random number between 1-10 with the following command.
echo $((( RANDOM % 10 )+1))
If you change it so the output is between 0-9 you get decently even results.
cat /dev/null > random.txt && cat /dev/null > random2.txt && for ((i=0; i<=9999;i++)); do echo $((( RANDOM % 10 ))) >> random.txt ; done && for ((i=0; i<=9;i++)); do echo $(grep -c $i random.txt) $i; done | sort -n
Note that you can change the command to be between 1-10, but all the 1’s in 10 will get grepped and counted as 1’s.
The above command should return something similar to the following. Sorted by lowest occurrences first.
943 5
945 8
985 7
996 2
997 6
1005 3
1012 9
1016 4
1033 0
1068 1
admin@localhost:~$
We can plot them in LibreOffice Calc.

Gnuplot is another utility that you can use to plot numbers. Example is below.
cat /dev/null > random.txt && cat /dev/null > random2.txt && for ((i=0; i<=9999;i++)); do echo $((( RANDOM % 10 ))) >> random.txt ; done && for ((i=0; i<=9;i++)); do echo $i $(grep -c $i random.txt) ; done | sort -n | gnuplot -p -e 'plot "/dev/stdin"'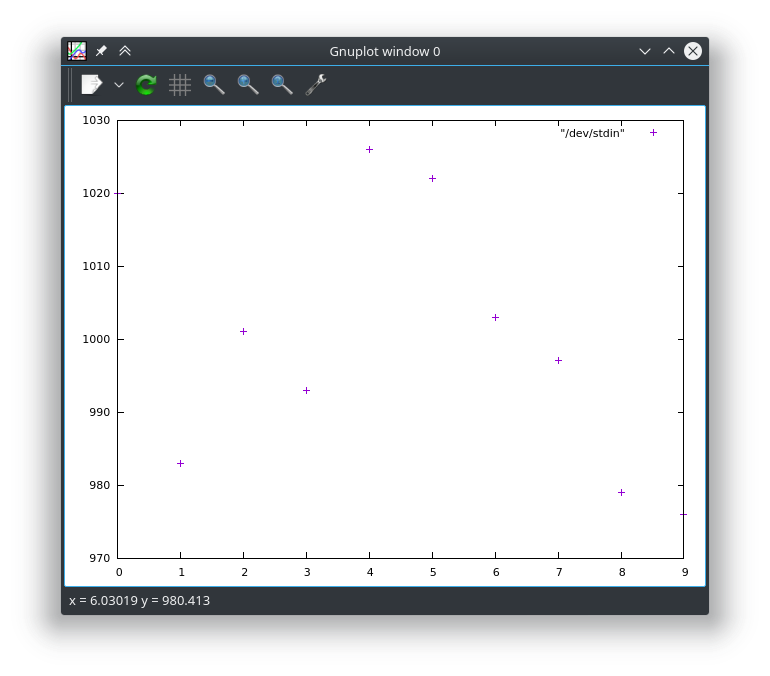
Find the thumb drive with lsblk, dmesg, or sudo fdisk -l. In the following examples we are using /dev/sdc1, replace as needed.
sudo cryptsetup --verbose --verify-passphrase luksFormat /dev/sdc1
sudo cryptsetup luksOpen /dev/sdc1 encrypted_usb
sudo mkfs.ext4 /dev/mapper/encrypted_usb
Now we can mount the drive. We are mounting it to /mnt change if needed.
sudo mount /dev/mapper/encrypted_usb /mnt
Or go ahead and close the channel and remove the drive
sudo cryptsetup luksClose /dev/mapper/encrypted_usb
sudo cryptsetup --verbose --verify-passphrase luksFormat /dev/sdc1
Wipe /dev/sdc1 and set the password when prompted for it.
sudo cryptsetup luksOpen /dev/sdc1 encrypted_usb
Open up a secure channel to the drive, and decrypt it so we can access it
sudo mkfs.ext4 /dev/mapper/encrypted_usb
Using the channel we created in the previous command, we can now format the drive.
sudo cryptsetup luksClose /dev/mapper/encrypted_usb
We can now close the channel for the drive and remove it.
Command from here
https://android.stackexchange.com/a/78183/239063
From a command line run
( printf "\x1f\x8b\x08\x00\x00\x00\x00\x00" ; tail -c +25 ~/Path/to/android_backup.ab ) | tar xfvz -
#!/bin/bash
array=(one two three)
echo "Printing first object in array."  #Replace 0 with the place number of the array item
echo ${array[0]}

echo ""

echo "Whole array"
echo ${array[*]}

echo ""

echo "Array indexes"
echo ${!array[*]}
Output
Printing first object in array.
one

Whole array
one two three

Array indexes
0 1 2
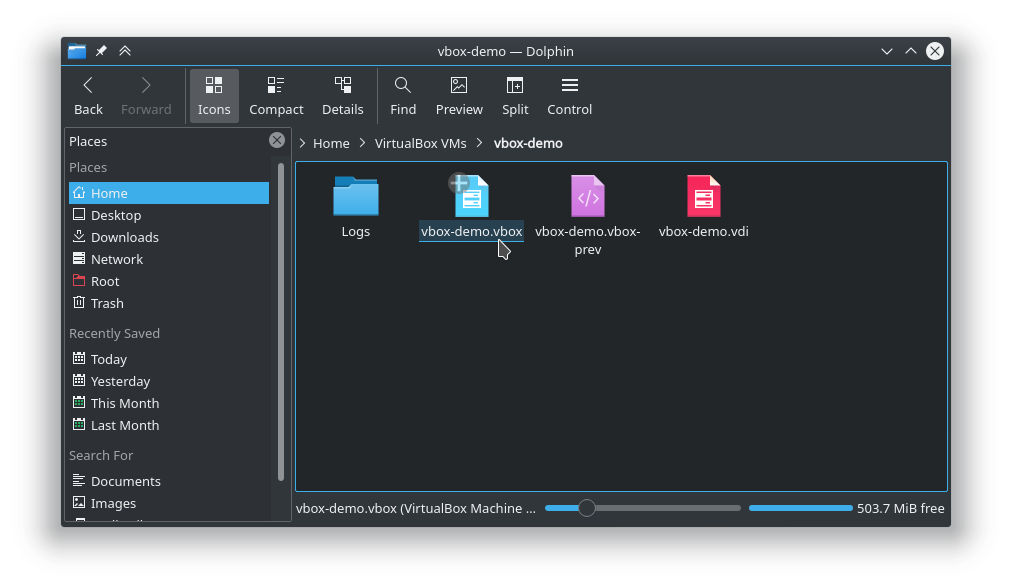
It appears that the issue could be a corrupt VirtualBox.xml file. The one I had did not have anything in it. Removing or moving the file let it create a new one and let VirtualBox actually start.
mv ~/.config/VirtualBox/VirtualBox.xml{,old}
Only problem is that none of the VM’s showed up. Was able to go to the ~/VirtualBox folder in a file browser and launch the vbox file to start the VM