AirGateway Random Users in Config!

Recently ran across some AirGateway configs that had an extra user account on them. Typically on most Ubiquiti AirMax and AirGateway equipment, there are two user accounts that show up in the config.

  • users.1.* which is the admin user.
  • users.2.* which is the read only user. Disabled by default

A cool trick we can do is add users in the config i.e. (users.3, users.4 etc.)

So what do you do when you see a third user showing up that you didn’t put there?!

The user account looked like the following.

users.3.name=112233AABBCC
users.3.password=Gczz8EBQEdAIg   
users.3.status=enabled

The username was the MAC address of the device and the password field is a DES(Unix) hash of what appears to be an 8 character randomly generated upper and lower case password.

Older AirOS versions only let a user select a password up to 8 characters long. You could create a longer one and log in via SSH, but you wouldn’t be able to log into the web interface.

Identifying Access

So how did these get on here in the first place?

I am guessing that the users were created at some point while trying to adopt them to UNMS/UISP before there was firmware that supported it. The user name is the actual MAC address of the device and the passwords do seem to be randomly generated. There do not appear to be any major differences between the support files from a normal AirGateway and a suspicious AirGateway.

Also appears to only affects AirGateways which were the only devices that had issues in the past connecting to UNMS/UISP. The rest of the AirMax equipment uses very similar firmware so if there was a security issue, it should have affected all the devices.

The hashing type “DES(Unix)” does not appear to be used anymore, being replaced with MD5 Crypt. So this does appear to have happened awhile ago.

Cracking the Hash

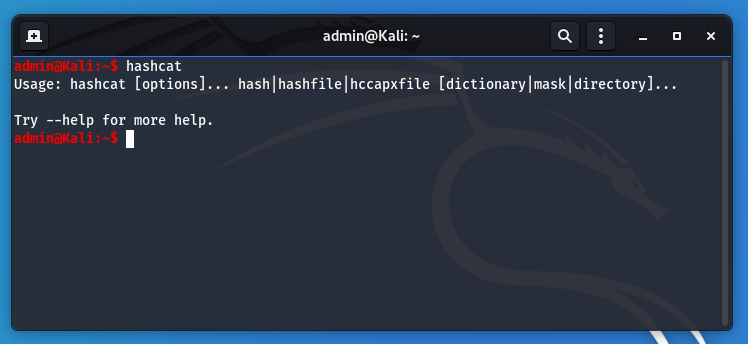
You’ll need hashcat installed and setup to crack the hash. Kali Linux has hashcat included (you will just want to have the NVIDIA drivers installed for optimal performance). You can also check out installing hashcat on Fedora, or check out the hashcat website for other systems. https://hashcat.net/hashcat/

Put the hashes of interest into a text file called hash.txt

Command to crack the passwords

 ./hashcat.bin -a 3 -m 1500 ./hash.txt -1?l?u ?1?1?1?1?1?1?1?1 -w 3 --session airgateway

the -1?l?u let’s us specify a custom character list made up of -l and -u. Lower and Upper case letters. –session airgateway will record a checkpoint ever so often. So if our run gets interrupted, we can restore the session with

./hashcat.bin --session airgateway --restore

Remediation

Fortunately, remediation is fairly simple.

SSH into the affected device and open up the config file

vi /tmp/system.cfg

Find the lines that start with “users.3.”, delete them, and save the file

Run the following command to save the changes.

/usr/etc/rc.d/rc.softrestart save 

If you are not comfortable with the command line, then you can, through the web gui, download a backup, edit the backup file in a text editor, then upload/restore the backup.

Other notes

Something else you may run across is a mcuser that shows up in /etc/passwd. This is typically a user used for AirControl, so if you have used AirControl in the past that is most likely why it is there. Check out the following article to remove the user.

Hashcat examples

Rule based attack

Use a wordlist and best64 rules to try and crack a wordpress hash. Using rockyou.txt as an example.

-m Specifies the hash type

hashcat -m 400 wordpress.hash -r rules/best64.rule wordlist/rockyou.txt

wordpress.hash is a text file that contains the password hash. You can list multiple hashes in the file

Example contents of file

bob@localhost:~$ cat wordpress.hash 
$P$BeJ2ZWVgSx/rR8ifcTFyjq1ouCCWwu0
bob@localhost:~$

Brute force

Attempt every 8 numeric combination for a WPA2 key.

hashcat -m 2500 -a3 capture.hccapx ?d?d?d?d?d?d?d?d

Hashcat built in Charsets

You can swap out the ?d from the above command with any of the built in character sets below.

  ? | Charset
 ===+=========
  l | abcdefghijklmnopqrstuvwxyz
  u | ABCDEFGHIJKLMNOPQRSTUVWXYZ
  d | 0123456789
  h | 0123456789abcdef
  H | 0123456789ABCDEF
  s |  !"#$%&'()*+,-./:;<=>?@[\]^_`{|}~
  a | ?l?u?d?s
  b | 0x00 - 0xff

More information
https://hashcat.net/wiki/doku.php?id=cracking_wpawpa2
Rule based attacks are recommended
https://hashcat.net/wiki/doku.php?id=rule_based_attack

Crack LUKS volume with Hashcat

Install hashcat

apt install hashcat

Find LUKS Volume

bob@localhost:~/$ dmesg
...
[ 1057.776074] sd 0:0:0:0: [sda] Write Protect is off
[ 1057.776074] sd 0:0:0:0: [sda] Mode Sense: 43 00 00 00
[ 1057.776593] sd 0:0:0:0: [sda] Write cache: enabled, read cache: enabled, doesn't support DPO or FUA
[ 1057.780234]  sda: sda1
[ 1057.783346] sd 0:0:0:0: [sda] Attached SCSI removable disk
bob@localhost:~/$

From the above we see that the drive we just pluGged into the system is “sda” so our path and partition is “/dev/sda1”

Run hashcat

The following command will run hashcat against “/dev/sda1”, change if the encrypted partition is different. Mode is to brute force every 8 numeric character combination. Refer to the following link to learn more about mask attacks.
https://hashcat.net/wiki/doku.php?id=mask_attack

Note: You should be able to dump the header and work off of that as well.

sudo hashcat -a 3 -m 14600 /dev/sda1 ?d?d?d?d?d?d?d?d

Install Hashcat Utils

Hashcat - Kali Linux

Hashcat on Kali Linux

Here is a quick way to download and install the Hashcat utils.

Download the Hashcat utils

wget https://github.com/hashcat/hashcat-utils/archive/master.zip

Run the following commands to unzip and make the binaries

unzip master.zip
cd hashcat-utils-master/src
make

You can now convert an aircrack file by invoking the cap2hccapx binary

./cap2hccapx.bin /path/to/aircrack.cap /path/for/output

Check out the following article for more details on converting Aircrack files to Hashcat hccapx

Need to install Hashcat on Fedora?

How to convert an Aircrack capture file to a Hashcat hccapx

Using Aircrack

aircrack-ng input.cap -J hashcat_output

Unfortunately the above command doesn’t seem to work anymore.

If you try to run Hashcat with the outputted file you’ll get an error.

hashcat_output.hccap: Old hccap format detected! You need to update: https://hashcat.net/q/hccapx

Using Hashcat utils

Refer to this guide for installing the Hashcat utils.

Basic syntax is

./cap2hccapx.bin input.cap output.hccapx

Example

~/Downloads/hashcat-utils-master/src/cap2hccapx.bin aircrack-01.cap aircrack.hccapx

Install Hashcat on Fedora

Install nVidia drivers.  Guide here.

Download binary files from the hashcat website

https://hashcat.net/hashcat/

or use wget

wget https://hashcat.net/files/hashcat-4.1.0.7z

Extract with p7zip

7z x hashcat-4.1.0.7z

cd into the hashcat directory

cd hashcat-4.1.0

Run hashcat

./hashcat64.bin -t 32 -a 7 example0.hash ?a?a?a?a example.dict

Example script:

sudo dnf install p7zip
wget https://hashcat.net/files/hashcat-4.1.0.7z
7z x hashcat-4.1.0.7z
cd hashcat-4.1.0
./hashcat64.bin -t 32 -a 7 example0.hash ?a?a?a?a example.dict

Errors:
If you get the following error, try re-extracting the 7z file with the “x” option, not “e”.  “x : eXtract files with full paths” and ” e : Extract files from archive (without using directory names)”

inc_cipher_aes256.cl: No such file or directory