How to “Lock” docker version on RHEL / RockyLinux / AlmaLinux

Sometimes it can be helpful to have a specific docker version that doesn’t change with a dnf update. To manually set the docker version, do the following.

Install dnf versionlock

dnf install 'dnf-command(versionlock)'

Next, lock the version for Docker and the Docker CLI.

dnf versionlock add docker-ce-3:27.5.0 docker-ce-cli-1:27.5.0

If you need to downgrade docker, you can do that with the following.

dnf downgrade docker-ce-3:27.5.0 docker-ce-cli-1:27.5.0

That should be it. If you want to check and see what packages are locked, run

dnf versionlock list

Example output:

Last metadata expiration check: 0:01:39 ago on Tue 08 Apr 2025 01:01:10 AM UTC.
docker-ce-3:27.5.0-1.el9.*
docker-ce-cli-1:27.5.0-1.el9.*

How to Fix UISP “Application is loading. 1 min remaining…” Again… fluentd Error

There is an issue upgrading to UISP version 2.4.188 on Ubuntu 22.04. If you manually run an update from the command line, you’ll receive an error stating:

Error response from daemon: unknown log opt 'fluentd-async-connect' for fluentd log driver
ERROR: Failed to start Postgres DB.
UISP install script failed. Attempting rollback…
Restoring previous configuration

The Resolution

To fix the problem, we can do one of two things:

  1. Downgrade Docker.
  2. Change fluentd-async-connect to fluentd-async in docker-compose files.

The commands are taken from the comments in the following link.

https://community.ui.com/releases/UISP-Application-2-4-188/dee1603c-9f36-413c-aad6-cd6a9fc68258?page=2

Downgrade Docker

Use apt to downgrade Docker.

sudo apt install docker-ce=5:27.5.1-1~ubuntu.22.04~jammy docker-ce-cli=5:27.5.1-1~ubuntu.22.04~jammy docker-ce-rootless-extras=5:27.5.1-1~ubuntu.22.04~jammy

After Docker is downgraded, you can manually run the update again.

sudo ~unms/app/unms-cli update

Modify Docker Compose File

All we need to do is replace fluentd-async-connect with fluentd-async in the docker-compose file in the unms user directory. We can do this with sed.

sudo sed -i.orig 's/fluentd-async-connect/fluentd-async/g' ~unms/app/docker-compose.yml
sudo sed -i.orig 's/fluentd-async-connect/fluentd-async/g' ~unms/app/docker-compose.yml.template

After we run both sed commands, start or update UISP.

sudo ~unms/app/unms-cli update

Backup UISP Application Backup Files with Rsync

UISP runs inside of a docker container. To copy out the backup files we need to use the “docker cp” command.

sudo docker cp unms:/home/app/unms/data/unms-backups ./uisp-backups

This will copy the backups into ./uisp-backups directory.

On an Ubuntu system, docker needs sudo permissions. If you copy the backups with the above command, the backup files will be assigned to the root user and you will not be able to use your normal user to manipulate the files.

You can either add your current user to the Docker group, or change the files owner

sudo chown username:username -R ./uisp-backups/

We can now copy all the automatic backups with rsync

sudo rsync -a ./uisp-backups -e "ssh -p 22" backupuser@backuphost:/backups

You can also automate this with Cron by doing something like

1 1 * * 1 docker cp unms:/home/app/unms/data/unms-backups ~/uisp-backups && rsync -a ~/uisp-backups -e "ssh -p 22" backupuser@backuphost:/backups

Every Monday at 1:01AM, copy the current UISP automatic backups, then use rsync to copy them to a remote server.

This expects that the current user has permissions to call Docker without sudo.

Give Ubuntu User Access to Run Docker?

By default on Debian based systems, Docker needs the sudo command to run. We can add a normal user to the Docker group so we don’t have to.

sudo usermod -aG docker username

Change out the username to your Ubuntu username.

The -a option means append the group to the username. It does not remove the user from current groups.
the -G option means add the specified group.

Setting up RRDReST on CentOS 8 or AlmaLinux 9

There are some differences on setting up RRDReST on CentOS 8, Almalinux 9 vs CentOS 7

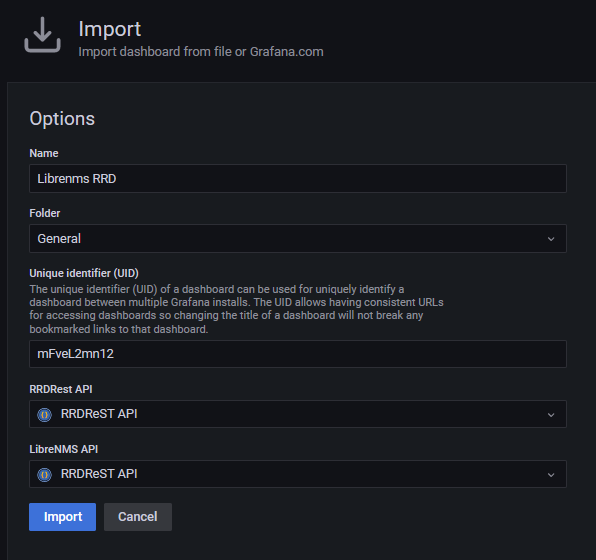
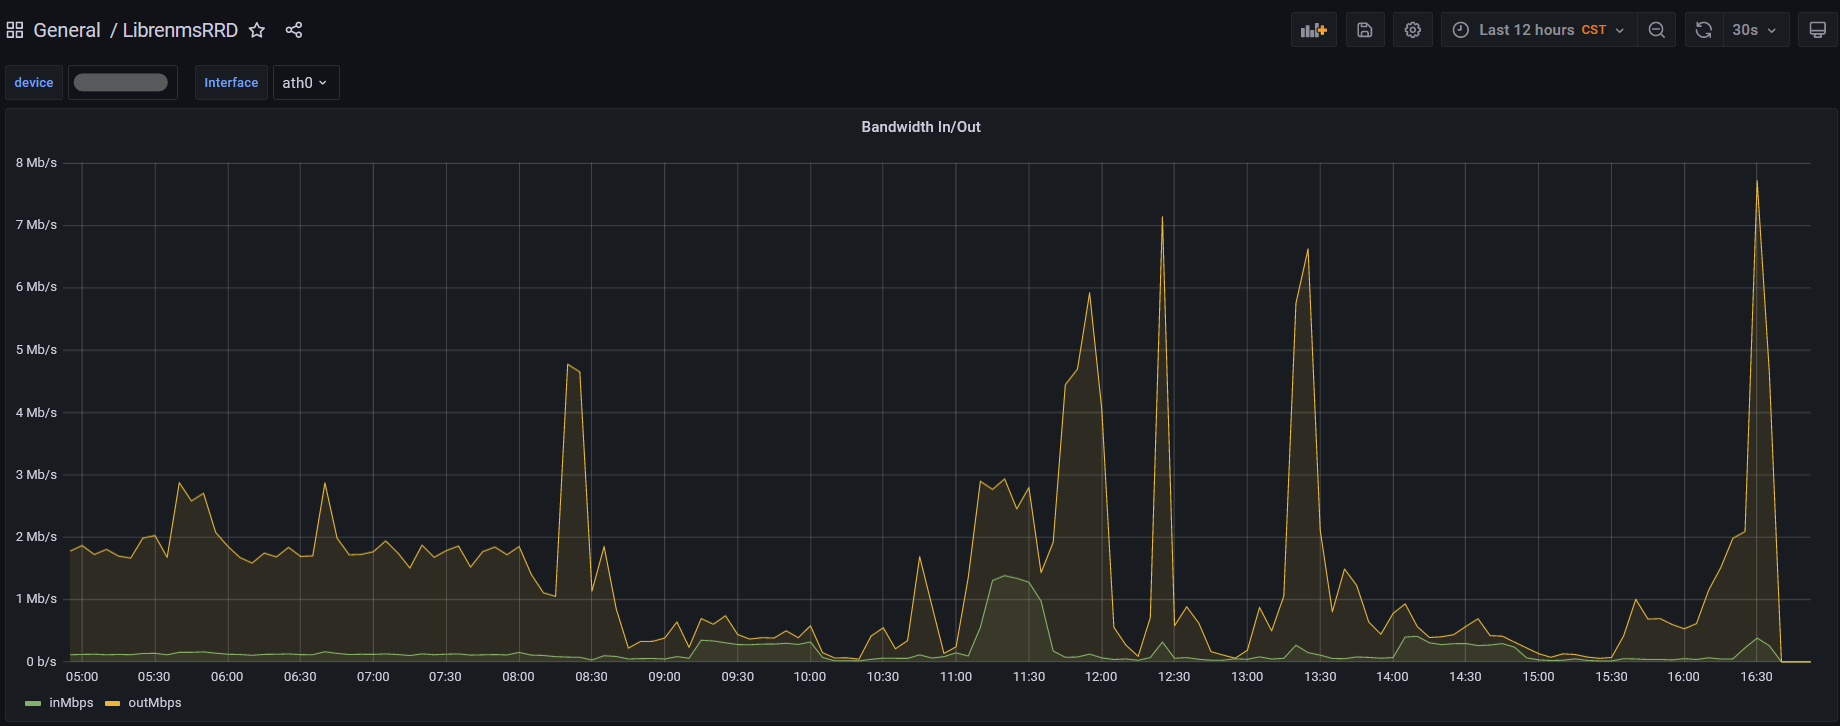
If you are setting this up to use with LibreNMS and Grafana, check out the rest of the this article. https://www.incredigeek.com/home/setting-up-grafana-on-librenms/

Installing RRDReST

All the docker commands have been swapped out for podman.

  1. Install Docker
  2. Create a compose file
  3. Run compose file to create container

Install docker

Podman is default on CentOS 8 and later and is, for the most part, a drop in replacement for Docker.

sudo yum install -y podman podman-compose
sudo systemctl enable podman

Create a Podman / Docker network to use. We’ll use this to assign a static IP address to the container. We’ll call the network rrdnet, and we’ll use the 10.89.2.0/24 range.

sudo podman network create --subnet=10.89.2.0/24 rrdnet

Create podman-compose file

Create a docker compose file

vi podman-compose.yml

Add the following

version: "3.5"
services:
  rrdrest:
    image: michaelwadman/rrdrest:latest
    container_name: rrdrest
    restart: always
    volumes:
      - "/opt/librenms/rrd:/opt/librenms/rrd:Z"
    environment:
      - TZ=America/Denver
    networks:
      rrdnet:
        ipv4_address: 10.89.2.2
        ipam:
          driver: default
          config:
            - subnet: 10.89.2.0/24
networks:
  rrdnet:
    external: true

Change the TZ to your time zone. If you have issues with the graphs, most likely something is off with the time zone between this container and Grafana/LibreNMS server

Note that the :Z is needed for SELinux to allow RRDReST to access the sub folders. AKA. the rrd files.

The container should have a 10.89.2.2 IP address. You can take all the networking sections out, and the container will receive DHCP. The problem is that the IP can change, breaking our graphs in Grafana.

Run RRDReST Container

Save the file. Then start and setup the container with

sudo podman-compose up -d

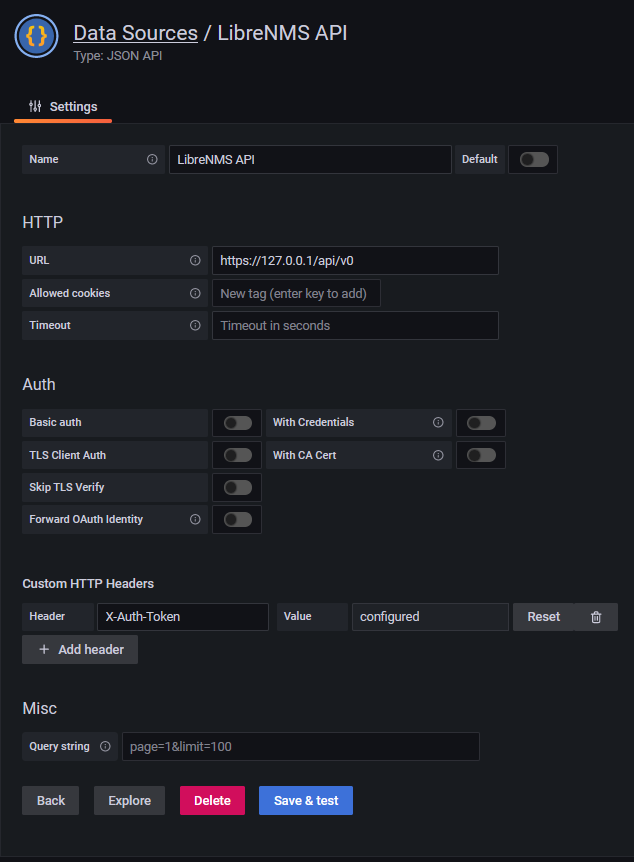
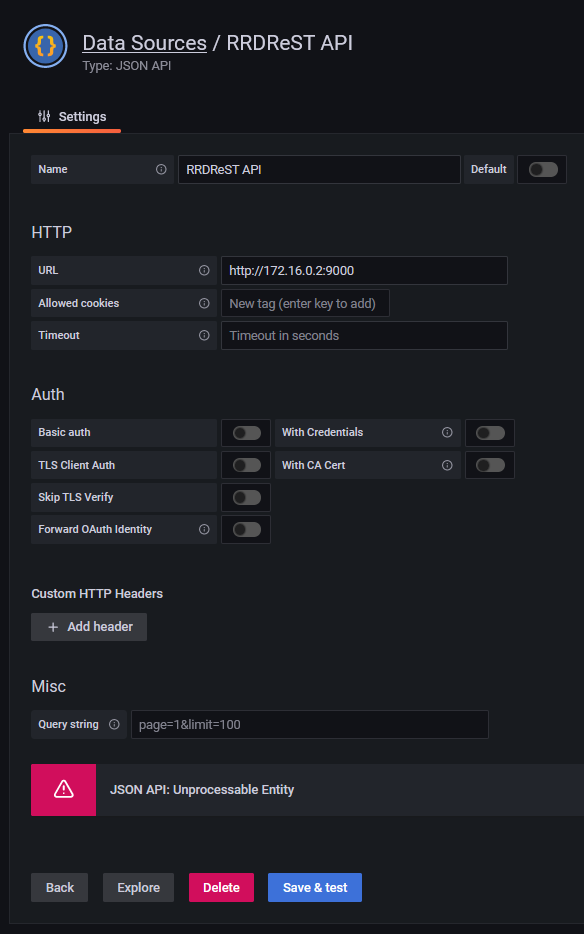
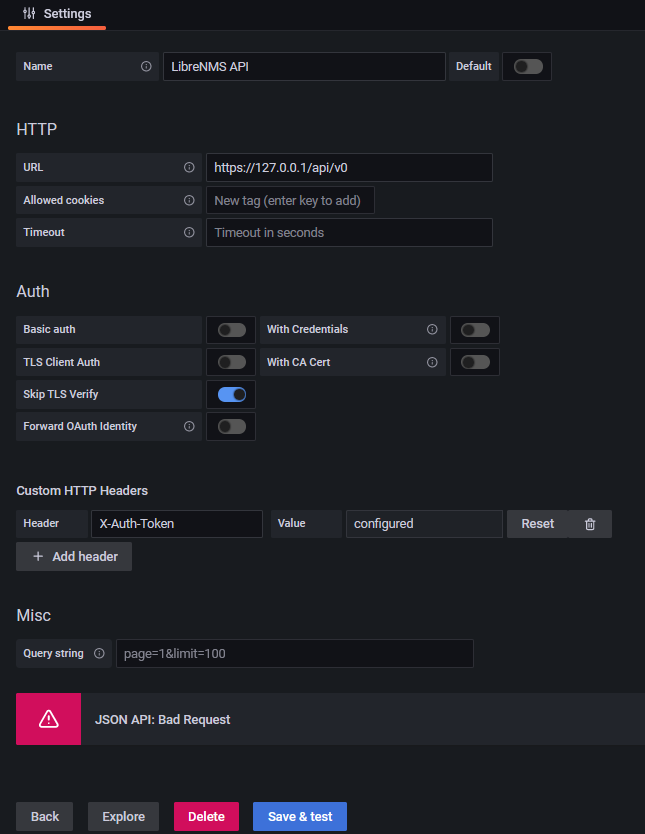
You will need your docker container IP address to setup the connection in Grafana. If you used the above docker-compose config, then it should be 10.89.2.2.

sudo docker exec -it rrdrest ip addr | grep eth0

Configure RRDRest to start on system boot with systemd

The “restart: always” option does not appear to work on systems with podman. We can create a systemd service instead.

Use the following command to automatically create a systemd file.

sudo podman generate systemd rrdrest

Copy the contents to a new file in /etc/systemd/system/

/etc/systemd/system/rrdrest.service

If you end up deleting the rrdrest container, you’ll need to update the systemd file again. You may need also need to run “systemctl daemon-reload”

Enable the new service with

systemctl enable rrdrest

Congratulations. RRDReST is now setup and running.

You can verify it’s running by checking with Podman / Docker.

sudo podman ps

You can also ping it

ping 10.89.2.2

Restart UniFi services on UDM

Mark manages the Ubiquiti UniFi applications at Incredigeek Inc. and is unable to access the UniFi controller. It starts loading and then stops. The URL bar shows that it is trying to load a null network site.

Thankfully the WiFi is still working, Mark thinks to himself, but how am I supposed to manage the network? I am able to access the UniFi Core application, so maybe I can login using a secure shell and check on the application.

ssh root@192.168.1.1

Once logged in, and after using the google, he finds that unifi-os restart will restart the UniFi applications. But I just need to restart the Network application. Running “unifi-os” –help reveals the following options.

# unifi-os --help
Usage: /usr/sbin/unifi-os [stop start restart shell 'update url']

Oh shell!

unifi-os shell

Alternatively, we know that on the UDM’s the UniFi Applications are run inside a Docker container. We could run “docker ps” to show the containers and then “docker exec -it unifi-os bash”

Now we can restart just the UniFi Network application.

systemctl restart unifi

It can take a little bit to restart.

Setting up Grafana on LibreNMS

Thanks to the guys who put together the information at the following links.

https://wadman.co.nz/2021/01/02/Viewing-LibreNMS-data-in-Grafana/
https://www.reddit.com/r/LibreNMS/comments/ojc8cc/how_to_almost_natively_integrate_librenms_and/

I ran into some issues trying to get this to work. So here are some of my notes. I already had a LibreNMS installation set up.

  1. Install RRDReST
    1. Install Docker
    2. Configure Docker compose file
  2. Configure LibreNMS API User and Key
  3. Set up and Configure Grafana
    1. Install Grafana
    2. Install JSON Data Source Plugin
    3. Add LibreNMS API Data Source
    4. Add RRDReST Data Source
    5. Import Dashboard into Grafana
  4. View graphs

Installing RRDReST

NOTE FOR CENTOS 8, ALMALINUX 8 and 9
The steps for installing RRDReST are slightly different. Check out the following post.
https://www.incredigeek.com/home/setting-up-rrdrest-on-centos-8-or-almalinux-9/

I had issues installing RRDReST. I am guessing it had to do with it accessing files. I was able to install it in a docker container.

  1. Install Docker
  2. Create a compose file
  3. Install container

Install docker

sudo yum install -y docker docker-compose
sudo systemctl enable docker

Create docker compose file with the following options

vi docker-compose.yml

Change the TZ to your time zone. If you have issues with the graphs, most likely something is off with the time zone between this container and Grafana/LibreNMS server

version: "3.5"

services:

  rrdrest:
    image: michaelwadman/rrdrest:latest
    container_name: rrdrest
    restart: always
    volumes:
      - "/opt/librenms:/opt/librenms"
    environment:
      - TZ=America/Denver

Save the file and start and setup the container with

sudo docker-compose up -d

You will need your docker container IP address to setup the connection in Grafana

sudo docker exec -it rrdrest ip addr | grep eth0

Congratulations. You should now have a RRDReST docker container that will auto start on system boot and has the correct time zone.

Configure LibreNMS API User and Key

  1. Create a Grafana user in LibreNMS. (Settings Gear -> Manage Users -> Add Users)
    You could technically skip this step and use an existing user.
  2. Create API token for the newly created user (Setting Gear -> API -> API Settings)
Create a Grafana user in LibreNMS
Setup API Key for Grafana in LibreNMS

Set up and Configure Grafana

Basic steps are as follows

  1. Install Grafana
  2. Install JSON Data Source Plugin
  3. Configure Data Sources
    1. LibreNMS API
    2. RRDRest API
  4. Import Dashboard into Grafana

Install Grafana

There is not anything special with installing Grafana on the same server as LibreNMS. You can follow the official guide to install it

https://grafana.com/docs/grafana/latest/installation/

After Grafana is installed, install the JSON API data source. You can do this using the grafana-cli

grafana-cli plugins install marcusolsson-json-datasource

A note on SSL/TLS certificates. If you have an SSL certificate for LibreNMS, you can use it for grafana. If you run into issues, try copying the cert (fullchain.pem, privkey.pem) to /etc/grafana/

You’ll most likely need to change owner

sudo chown root:grafana /etc/grafana/*.pem

And maybe the file permissions.

sudo chmod 640 /etc/grafana/*.pem

Install JSON Data Source Plugin

This is fairly straight forward.

grafana-cli plugins install marcusolsson-json-datasource

Add LibreNMS API Data Source

In Grafana, go to Configuration -> Data Sources -> Add data source

  • Set Name for Data Source
  • URL should be https://your_librenms_url/api/v0
  • Add Custom HTTP Header
    • Header field should be “X-Auth-Token”
    • Value field should contain the API token we created in LibreNMS
  • Save and Test
    If you receive any errors, refer to the Troubleshooting part at the end.
Adding LibreNMS API Data Source in Grafana

Add RRDReST Data Source

In Grafana, go to Configuration -> Data Sources -> Add data source

  • Set Name for Data Source
  • URL needs to be your docker container IP address (Steps above)
  • Save and Test (Should return “Unprocessable Entity”)
Adding RRDReST API Data Source in Grafana

Import Dashboard into Grafana

Now we need a dashboard to present our data.

  • Go to Create -> Import
  • Upload JSON file (Download from here or PasteBin )
  • Under RRDReST API , select our RRDReST Data Source
  • Under LibreNMS API , select our LibreNMS Data Source
  • Click Import

You should now be able to view your dashboard and use the drop down menus to select devices

Grafana viewing bandwidth on device being monitored by LibreNMS

Troubleshooting

There were a couple of issues I ran into while trying to get everything working together.

RRDReST shows 404 Not Found

Issue: When trying to run RRDReST with uvicorn, I was never able to access the rrd files, even the test rrd files that are included when installing RRDReST. I am guessing it is either a permisions issue, or something unable to access the files.
Work around: Install RRDReST via Docker container.

Error Running uvicorn RRDReST

Error Adding LibreNMS API

Issue: Get a “JSON API: Bad Request” when trying to set up the LibreNMS API Data Source in Grafana.

Work around: Install a valid SSL Certificate and set up a DNS record so you can access LibreNMS at librenms.yourdomain.com.

More info: I would assume that “Skip TLS Verify” would work with or without a valid certificate, but it would not work for me. There are potentially some other options with modifying how Nginx or Apache is set up that would get this working. If you setup Grafana to use a SSL certificate, you may need to copy the certificate files (fullchain.pem, privkey.pem) to /etc/grafana/ and run “chown root:grafana *.pem” to let grafana have access to the files.

Grafana LibreNMS API JSON API: Bad Request

Backup Matrix Synapse PostgreSQL Database

This is part of a series of posts on backing up and restoring a backup for Matrix Synapse server. Synapse was installed using the matrix-docker-ansible deployment which while a little complicated can greatly ease management later on down the road. All the main components are in docker containers so we need to use docker to access.

https://github.com/spantaleev/matrix-docker-ansible-deploy/blob/master/docs/maintenance-postgres.md#backing-up-postgresql

As the root user run

docker exec --env-file=/matrix/postgres/env-postgres-psql matrix-postgres pg_dumpall -h matrix-postgres | gzip -c > /matrix/postgres.sql.gz

This will dump the Postgres database in /matrix/postgres.sql.gz
We can use this later to restore to a new server or keep as a backup.

Install UniFi 5.6.42 in Docker

Pull UniFi 5.6.42 docker image

sudo docker pull jacobalberty/unifi:5.6.42

Install image

sudo docker run -d --init --restart=unless-stopped --name=unifi-controller --net=host --volume=/docker/unifi:/var/lib/unifi -p 8080:8080/tcp -p 8081:8081/tcp -p 8443:8443/tcp -p 8843:8843/tcp -p 8880:8880/tcp -p 8883:8883/tcp -p 3478:3478/udp jacobalberty/unifi:5.6.42

Access and setup the unifi controller from a browser.

https://ip-address:8443