Log rotation for rsyslog using fixed size

We’ll follow the documentation from here.

Changes are made to the /etc/rsyslog.conf config file.

For this example, we will be configuring our named.log file to not exceed 50MiB, and then we’ll have a rotated log “.1” that is also 50MiB. Total it should not exceed 100BMiB.

First we need to create an out channel, and then we assign the out channel to a logging channel. We also need a script that rotates the logs.

Create the Output Channel

$outchannel log_rotation,/var/log/named.log, 52428800,/home/user/log_rotation.sh

Assign Output Channel to Logging Channel

On our line that is logging named, at the end add :$log_rotation

Example:

local0.*                   /var/log/named.log:$log_rotation

Script to Rotate Log

Somewhere on the system, create a rotate.sh script. Name it whatever you want, just be sure the path and name in the rsyslog.conf is the same.

Add the following one line to move the current log to a rotate log.

mv -f /var/log/named.log /var/log/named.log.1

As the log fills up and hits ~50MiB, the named.sh script will run which rotates(moves) the log file to logfile.log.1. This will keep our usage for named.log to 100MiB.

How to Bubble and Unbubble Conversations on Android

How to Bubble a conversation

Make sure Bubbles is on in the system settings. When you receive a message that supports bubbles, there should be a little button on the notification. Tap it to pop the message out into a bubble.

How to pop the bubbled “Unbubble” conversation

Unbubbling a conversation is the exact same steps. When you receive a notification, tap the unbubble button. That conversation will now not bubble.

How To Hack Your Bank Account “$1 Million” using Kali Linux

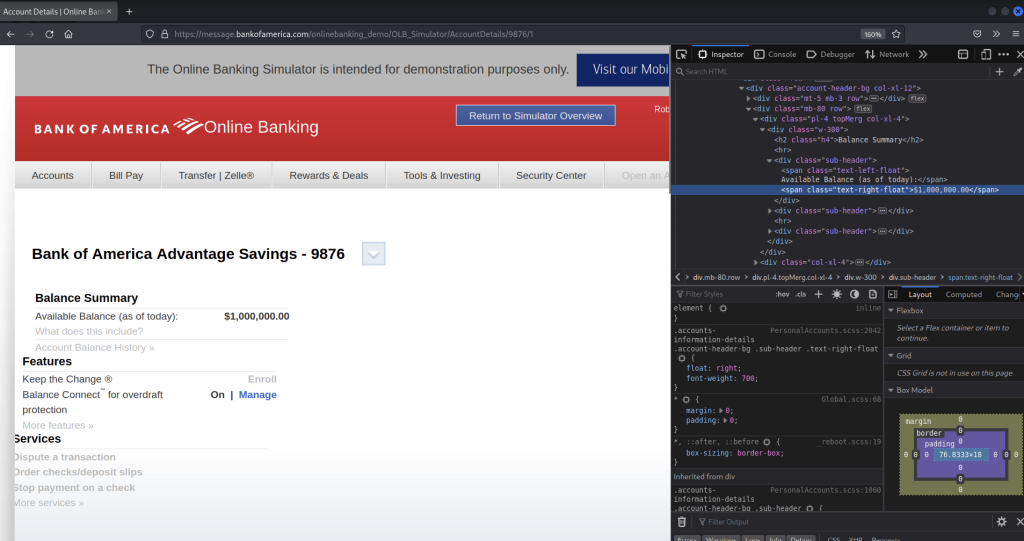
Disclaimer. Okay, we are not actually going to “hack” your bank account. But we are going to quickly use the developer tools to manipulate text on our browser.

  1. Log into your bank account.
  2. Find your bank and the current amount.
  3. Open up the Developer Tools ( Menu Option > More tools > Web Developer Tools
  4. In the top left of the developer window, select the mouse. This should let you go to the web page, click on your “account balance”.
  5. Double click and change your “account balance” to $1 Million.

Congratulations! You are a millionaire. At least on paper.

*If you honestly were looking for a way to hack your bank account for 1 million dollars… Stop…

17 Must Know Git Commands

Quick and dirty cheat sheet for using git

Configure user

git config --global user.name "Username"

git config --global user.email "email@email.com"

Initialize git

git init

Check log of commits

git log

Check status

git status

Add all files to staging to be committed

git add -A

Setup .gitignore, to ignore files and directories

Example to add .DS_Store files to the ignore file.

echo ".DS_Store" >> .gitignore

Undo commits

git reset --hard

https://stackoverflow.com/questions/927358/how-do-i-undo-the-most-recent-local-commits-in-git

Branches

Setup a branch

git branch branch_name

Switch to a branch

git checkout branch_name

Merge branch to master

git checkout master
git merge branch_name

Remote Repository (GitHub)

https://docs.github.com/en/get-started/getting-started-with-git/managing-remote-repositories

You’ll can setup SSH keys to connect to GitHub.

https://docs.github.com/en/authentication/connecting-to-github-with-ssh/adding-a-new-ssh-key-to-your-github-account

git remote add origin git@github.com:OWNER/REPO.git

Setup origin

git push --set-upstream origin master

Upload files to GitHub

git push origin master

Verify remote origin

git remote -v

Set origin URL (Helpful if it has already been added)

git remote set-url origin git@github.com:OWNER/REPO.git

Install Guide for Pangolin Whisper Web Interface on Linux

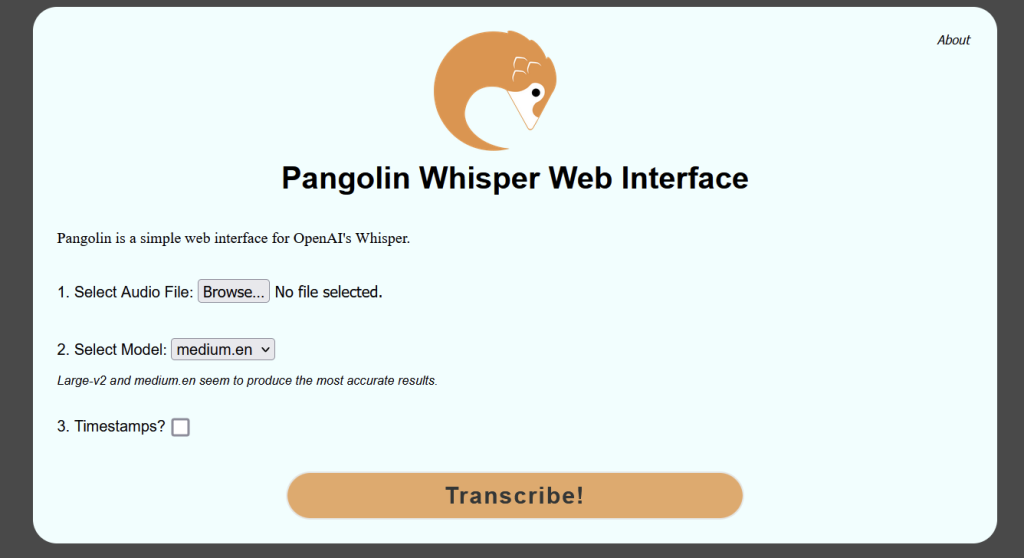
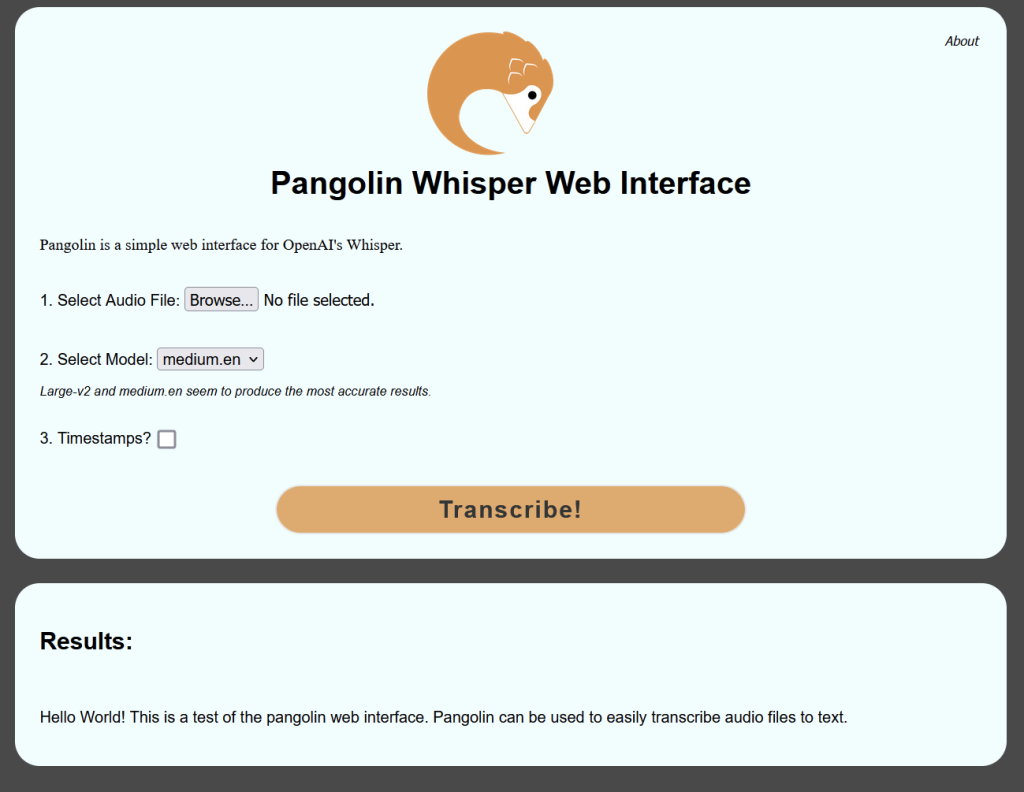
Pangolin is a simple web interface for OpenAI’s Whisper system. Very easy and simple to use.

https://github.com/incredig33k/pangolin/

Add User

We’ll setup a new unprivileged user called pangolin.

sudo useradd -m pangolin
sudo passwd pangolin
su pangolin
cd
pip3 install whisper-ctranslate2
  or 
pip3.9 install whisper-ctranslate2
npm install https formidable@2.1.1 fs path url
wget https://github.com/incredig33k/pangolin/releases/download/pre-release/pangolin-web.zip
unzip ./pangolin_web.zip
cd pangolin_web
mkdir uploads

Change default port to 8443. It is possible to use 443, but we would need to run privileged

sed -i "s/443/8443/g" ./pangolin_server.js

Setup SSL Certificate

This assumes you already have Let’s Encrypt setup. We’ll create a certificate directory for Pangolin to use and then copy the certs there.

mkdir /home/pangolin/ssl
sudo cp /etc/letsencrypt/live/DOMAINNAME.COM/fullchain.pem /home/pangolin/ssl/
sudo cp /etc/letsencrypt/live/DOMAINNAME.COM/privkey.pem /home/pangolin/ssl/
sudo chown pangolin:pangolin /home/pangolin/ssl/fullchain.pem
sudo chown pangolin:pangolin /home/pangolin/ssl/privkey.pem

Now back in our web directory we can update the vars.js file like the following.
Note that we do need the full file path. Can’t use ~/

module.exports = {
key: '/home/pangolin/ssl/privkey.pem',
cert: '/home/pangolin/ssl/fullchain.pem'
}

Firewall rules

We can change the port Pangolin runs on by editing the listen port at the bottom of the pangolin_server.js file.

sudo firewall-cmd --add-port=443/tcp

Setting up systemd Service

Now we need to copy our service file and enable the Pangolin service.

sudo cp /home/pangolin/pangolin_web/pangolin.service /usr/lib/systemd/system/pangolin.service
sudo systemctl enable pangolin.service

Start the service

sudo systemctl start pangolin

How to Archive UniFi Protect Footage

Here are some links and notes on archiving a UniFi Protect’s footage.

Apparently, the .ubv files just need to be remuxed to .mp4 so they are easily playable. On the UniFi Protect appliances, they have a ubnt_ubvexport and ubnt_ubvinfo binary that can do the remux. You can copy the binary off and run it with QEMU on x86 hardware.

Helpful Links.

https://github.com/danielfernau/unifi-protect-video-downloader

https://github.com/petergeneric/unifi-protect-remux

https://durdle.com/2022/01/22/extract-unifi-protect-video/

RSYNC

We can setup rsync to copy the raw footage off the Unifi Protect appliance. Once we have it locally, we can use the remux tool to convert the files to .mp4 so we can easily view them.

A cool thing about using rsync, is if our copy gets interrupted, we can just rerun the command and it will pick up where it left off without duplicating anything.

The following command is a mouthful. It searches for all the recorded video files for cameras with the MAC addresses specified. (MAC addresses can be found from the web interface), There are only a couple things to change or tweak for the command to work for you.

MAC1 should be the MAC address of camera 1 while MAC2 is the MAC address of the next camera we want to archive.
Change the dst_directory to the archive directory or drive.
And of course we need to change the IP address (10.0.0.1) to the UniFi Protect IP address.

ssh root@10.0.0.1 'find /srv/unifi-protect/video/ \( -name "MAC1*" -o -name "MAC2*" \) -printf %P\\0\\n' | rsync -a -v --exclude="*timelapse*" --files-from=- root@10.0.0.1:/src/unifi-protect/video/ dst_directory/

Here are the details for the commands.

  • -printf %P\\0\\n : Don’t print the full path, i.e. “/src/unifi-protect/video/”
  • -name “MAC1*” : Search for recording files that start with camera mac1 address.
  • -o -name “MAC2*” : Let’s us search for multiple “cameras” add more -o -name “mac3*” etc
  • rsync
  • -a : archive mode, copies date, permissions etc.
  • -v : verbose output. Not needed, but it is nice to see what it is copying.
  • –exclude=”*timelapse*” : Exclude timelapse files. Remove this if you want to archive them.
  • –files-from=- : Tells rsync to use the standard input for the list of files to download.
  • root@10.10.1.1:/src/unifi-protect/video/ : This is the source directory for where the video files are located
  • /archive/directory : The path where we are archiving the video footage.

Acquire ubnt_ubvinfo from UDM

Before we can use remux, we need to setup a local copy of ubnt_ubvinfo.

You should be able to use the following scp command to copy the ubnt_ubvinfo or ubnt_ubvexport binary from the UniFi Protect appliance.

scp root@10.0.0.1:/usr/share/unifi-protect/app/node_modules/.bin/ubnt_ubvexport ./

To install on Intel or AMD CPU’s, check out the following section on the unifi-protect-remux page.

https://github.com/petergeneric/unifi-protect-remux#quick-start-for-x86-linux

As a side note, it looks like you can download an old x86 version of ubnt_ubvinfo from archive.org. Use at your own discretion.

wget https://archive.org/download/ubnt_ubvinfo/ubnt_ubvinfo

Install unifi-protect-remux

Install ffmpeg

apt install -y ffmpeg

or

dnf install -y ffmpeg

Now we can download and install remux.

wget https://github.com/petergeneric/unifi-protect-remux/releases/download/v3.0.6/remux-x86_64.tar.gz
tar zxf remux-x86_64.tar.gz
sudo mv remux /usr/bin/

Now we can remux the files.

remux --with-audio=true dst_directory/*.ubv

You will need to script a way to recursively loop through the directories, or just do it manually.

CSS Tips

Here is some simple CSS code snippets that I have found useful.

Disable over scroll effect

html {
  overscroll-behavior: none
}

https://developer.mozilla.org/en-US/docs/Web/CSS/overscroll-behavior

Radial gradient to cover all of the background

html {
  width: 100vw;
  min-height: 100vh;
  background: radial-gradient(#676767, #232323);
}

Overlay that blurs and dims background

.overlay {
  position: absolute;
  top: 0;
  left: 0;
  height: 100%;
  width: 100%;
  background-color: rgba(0, 0, 0, 0.6);
  backdrop-filter: blur(5px);
  z-index: 7;
}

How to Display Pictures on NodeJS http Server

If you are using http for a NodeJS application, you may have run into an issue where none of your images are loading on a site. Instead you are greeted with nice little “no image” logos.

The issue is that our NodeJS server has not been instructed to load anything other than index.html. So other things like images, or even CSS from our style.css file wont work properly.

To fix the issue, we need to to tell NodeJS what to do when other files are requested. As a side note, the person browsing the site may not be requesting the resources directly, but index.html file requests the css file or images hence creating a new web request.

Let’s say we are starting with the following code as a starting point.

var http = require('http')
var fs = require('fs')
var path = require('path')
var url = require('url')

http
  .createServer(function (req, res) {
    let pathname = url.parse(req.url).pathname
    if (
      req.method === 'GET' &&
      (pathname === '/' || pathname === '/index.html')
    ) {
      res.setHeader('Content-Type', 'text/html')
      fs.createReadStream('./index.html').pipe(res)
      return
    }
    return res.end()
  })
  .listen(3000)

Our HTML code is very basic.

<html>
<head>Hello World!</head>
<br />
<body><img src="./image.png" width="128"></body>
</html>

When we launch our server with

$ node server.js

We get

The Fix

Essentially what we need to do is tell the server what to do when image.png is requested.

So we can add the following to our server code before the line “return res.end()”

    if (req.method === 'GET' && pathname === '/image.png') {
      res.setHeader('Content-Type', 'image/png')
      fs.createReadStream('./image.png').pipe(res)
      return
    }

And voila! it is fixed!

Taking it Further

We can improve on this and add a favicon, as well as our style sheet.

var http = require('http')
var fs = require('fs')
var path = require('path')
var url = require('url')

http
  .createServer(function (req, res) {
    let pathname = url.parse(req.url).pathname
    if (
      req.method === 'GET' &&
      (pathname === '/' || pathname === '/index.html')
    ) {
      res.setHeader('Content-Type', 'text/html')
      fs.createReadStream('./index.html').pipe(res)
      return
    }
    if (req.method === 'GET' && pathname === '/image.png') {
      res.setHeader('Content-Type', 'image/png')
      fs.createReadStream('./image.png').pipe(res)
      return
    }

    if (req.method === 'GET' && pathname === '/favicon.ico') {
      res.setHeader('Content-Type', 'image/x-icon')
      fs.createReadStream('./favicon.ico').pipe(res)
      return
    }

    if (req.method === 'GET' && pathname === '/style.css') {
      res.setHeader('Content-Type', 'text/css')
      fs.createReadStream('./style.css').pipe(res)
      return
    }
    return res.end()
  })
  .listen(3000)

This will let us put a favicon.ico image to use as a favicon it will use style.css to stylize the website.

We should note that while the above code does work, you will most likely want to use something like express.
https://github.com/expressjs/express

You can also find better code implementations others of done online.

https://stackoverflow.com/questions/5823722/how-to-serve-an-image-using-nodejs

Links for setting up a custom SSL Certificate on a UniFi Cloud Key

Here are some links for setting up a custom SSL Certificate of a UniFi Cloud Key. Should be similar to do on a UDM, or other UniFi Controller.

https://community.ui.com/questions/How-to-install-a-SSL-Certificate-on-Unifi-Cloud-Key/944dbbd6-cbf6-4112-bff5-6b992fcbf2c4

https://community.spiceworks.com/how_to/128281-use-lets-encrypt-ssl-certs-with-unifi-cloud-key

https://www.ssldragon.com/how-to/install-ssl-certificate/unifi-cloud-key/