Log into the cPanel server via ssh
root@cpanelserver
run the following command to force update the cPanel license.
/usr/local/cpanel/cpkeyclt

Log into the cPanel server via ssh
root@cpanelserver
run the following command to force update the cPanel license.
/usr/local/cpanel/cpkeyclt
Here are the basic steps of how to setup ssh keys for zenoss.
Example:
[root@zenoss ~]# serviced service shell -s AddingSSHkey -i zope bash
I0709 3:02:47.791788 01773 server.go:341] Connected to the control center at port 192.168.1.10:4979
I0709 3:02:48.127949 01773 server.go:435] Acquiring image from the dfs...
I0709 3:02:48.131438 01773 server.go:437] Acquired!  Starting shell
Trying to connect to logstash server... 127.0.0.1:5042
Connected to logstash server.
[root@321feeg2253a /]# su zenoss
[zenoss@321feeg2253a /]$ ssh-keygen -t dsa
Generating public/private dsa key pair.
Enter file in which to save the key (/home/zenoss/.ssh/id_dsa):
Enter passphrase (empty for no passphrase):
Enter same passphrase again:
Your identification has been saved in /home/zenoss/.ssh/id_dsa.
Your public key has been saved in /home/zenoss/.ssh/id_dsa.pub.
The key fingerprint is:
12:ab:14:d5:54:09:d3:1f:f7:12:21:ae:hd:16:a5:1b zenoss@321feeg2253a
The key's randomart image is:
+--[ DSA 2048]----+
|     =====F      |
|    S+== + AA    |
|  A=+=++  +      |
| AB= .. + =      |
|  ++S S  +.      |
|   ..    -       |
|                 |
|                 |
|                 |
+-----------------+
[zenoss@321feeg2253a /]# ssh-copy-id admin@192.168.1.10
The authenticity of host '192.168.1.10 (192.168.1.10)' can't be established.
RSA key fingerprint is 12:ab:14:d5:54:09:d3:1f:f7:12:21:ae:hd:16:a5:1b.
Are you sure you want to continue connecting (yes/no)? yes
/usr/bin/ssh-copy-id: INFO: attempting to log in with the new key(s), to filter out any that are already installed
/usr/bin/ssh-copy-id: INFO: 1 key(s) remain to be installed -- if you are prompted now it is to install the new keys
admin@192.168.1.10's password:

Number of key(s) added: 1

Now try logging into the machine, with:   "ssh 'admin@192.168.1.10'"
and check to make sure that only the key(s) you wanted were added.

[zenoss@321feeg2253a /]# exit
exit
[root@321feeg2253a /]# exit
exit
[root@zenoss ~]# serviced snapshot commit AddingSSHkey
0sdj2jj412waawjideow120x_isjriw19-121200
[root@zenoss ~]# exit
Here is a quick script I created to automate copying a ssh key to multiple remote servers.
Basic command – the command uses sshpass to upload the ssh key to a remote server, this allows you to execute the command and not have to enter in a password to authenticate.
sshpass -p password ssh-copy-id -o StrictHostKeyChecking=no admin@remotehost
Script
#!/bin/bash

remotehosts="$1"
username="admin"
password="MyCoolPassword123"

for host in `cat ${remotehosts}`
do
sshpass -p${password} ssh-copy-id -o StrictHostKeyChecking=no ${username}@${host}
echo "Uploaded key to " ${host}
done

echo "Finished!"
Using the script
chmod +x sshcopy.sh
./sshcopy.sh hostlist.txt
Example:
wget www.incredigeek.com/home/downloads/SSHCopy/sshcopy.sh
chmod +x sshcopy.sh
sed -i s/admin/bob/g sshcopy.sh                      <-- Change username - you can just manually edit the file,
sed -i s/MyCoolPassword123/password/g sshcopy.sh     <-- Change password - it might be easier than using sed
echo "192.168.1.100" >> host.txt                     <-- Add 192.168.1.100 to the host list
echo "Bob" >> host.txt                               <-- Add hostname bob to host list
./sshcopy.sh host.txt                                <-- Upload ssh key to all host's in the host file i.e. "bob" and "192.168.1.100"
Install kernel headers, dkms, etc
dnf -y kernel-headers kernel-devel dkms gcc gcc-c++
Reboot the VM
reboot
Mount the Guest Additions by going to menu > Devices > Insert Guest Additions CD image… or you can hit “Host + D”.
The Host key is typically the Right Ctrl(On Windows) or CMD(On OS X) key.
Via the GUI
Mount the Guest Additions from your file browser, and then launch the “VBoxLinuxAdditions.run”.
You will need root privileges, so either launch your file browser as root, or drag and drop the “VBoxLinuxAdditions.run”, into a root terminal and hit Enter.
Via Command Line
mkdir /tmp/vbox
sudo mount /dev/cdrom /tmp/vbox
sudo /tmp/vbox/VBoxLinuxAdditions.run
If you run into any errors, try ejecting, and remounting the Guest Additions cd.
Generate a key with the following command. If you are trying to setup passwordless authentication, then do not enter in a password
ssh-keygenor if you want to use DSA,
ssh-keygen -t dsa
Example:
[root@localhost ~]# ssh-keygen
Generating public/private rsa key pair.
Enter file in which to save the key (/root/.ssh/id_rsa):
Enter passphrase (empty for no passphrase):
Enter same passphrase again:
Your identification has been saved in /root/.ssh/id_rsa.
Your public key has been saved in /root/.ssh/id_rsa.pub.
The key fingerprint is:
ef:f2:34:e5:12:ac:ab:1b:67:9f:ff:00:12:2d:cd:16 root@localhost
Upload public key to server. Note: you will need to enter in your Password so ssh-copy-id can upload the key, after that you should not need to enter in a password.
ssh-copy-id root@remote-server
Now login to the remote server.
ssh root@remote-server
There are multiple ways to view log files, here are some common ways.
tail the log, shows the 10 most recent log entries.
tail /var/log/messages
tail the log and keep monitoring it for new entries.
tail -f /var/log/messages
Find specific info in log file
cat /var/log/messages | grep texttosearch
cPanel Log Paths
Main log
/var/log/messages
Access logs
/usr/local/cpanel/logs/access_log
Access logs for a specific domain
/home/user/access-logs/domainname.com
Account Transfers/miscellaneous logs
/var/cpanel/logs
Auditing Log (Account creation and deletions)
/var/cpanel/accounting.log
Backup Logs
/usr/local/cpanel/logs/cpbackup
CPHULKD Log
/usr/local/cpanel/logs/cphulkd.log
DNSAdmin, DNS Clustering
/usr/local/cpanel/logs/dnsadmin_log
Task Queue Processing Daemon
/usr/local/cpanel/logs/queueprocd.log
DBMapping
/usr/local/cpanel/logs/setupdbmap_log
Easy Apache Build logs
/usr/local/cpanel/logs/easy/apache/
Error logs
/usr/local/cpanel/logs/error_log
/var/log/cpanel
License log
/usr/local/cpanel/logs/license_log
local database modifications
/usr/local/cpanel/logs/build_locale_database_log
Login errors CPSRVD
/usr/local/cpanel/logs/login_log
Bandwidth History
/var/cpanel/bandwidth/{USERNAME}
Service Status Logs
/var/log/chkservd.log
Tailwatch log
/usr/local/cpanel/logs/tailwatch_log
Update Analysis Reporting
/usr/local/cpanel/logs/updated_analysis/{TIMESTAMP}.log
Update log UPCP
/var/cpanel/updatelogs/updated.{TIMESTAMP}.log
cPanel Email Logs
Horde log
/var/cpanel/horde/log/
RoundCube
/var/cpanel/roundcube/log/
Squirrel Mail
/var/cpanel/squirrelmail/
Panic log
/usr/local/cpanel/logs/panic_log
Delivery and receipt log
/var/log/exim_mainlog
Incoming mail queue
/var/spool/exim/input/
Log of messages rejected based on ACLS or other policies
/var/log/exim_rejectlog
Unexpected/Fatal error log
/var/log/exim_paniclog
IMAP, POP login attempts, transactions, fatal errors and spam scoring
/var/log/maillog
Mailman
/usr/local/cpanel/3rdparty/mailmain/logs
MySQL
MySQL error log
/var/lib/mysql/{SERVER_NAME}.err
MySQL slow query log (if enabled in my.cnf)
/var/log/slowqueries
Log into your Zenoss server via ssh.
ssh root@zenossserver
Create working direcotry
mkdir /tmp/zenpack && cd /tmp/zenpack/
Now upload the ZenPack to “/tmp/zenpack/” on your Zenoss server with your favorite ftp tool.
Stop the Zenoss service
serviced service stop zenoss.core
Restart the services needed to import the ZenPack i.e. the following.
ZooKeeper
mariadb
RabbitMQ
redis
zeneventserver
Zope
You can start all of them with the following commands
serviced service start ZooKeeper
serviced service start mariadb
serviced service start RabbitMQ
serviced service start redis
serviced service start zeneventserver
serviced service start Zope
Install ZenPack with the following command
serviced service run zope zenpack install ZenPack.xxx.xxx.egg
Restart Zenoss
serviced service restart zenoss.core
Log into Zenoss and make sure that it is working right.
Check to see if you have an import template.
In the Main Menu click “View” and check “Hidden Objects”, in the Server View you should see a Template named something like “XenServer Transfer VM 6.2.0-123456c (hidden)”
If you don’t have one, then run the following command on the XenServer to create a template.
/opt/xensource/packages/files/transfer-vm/install-transfer-vm.sh
If the command fails double check that you have a default storage repository selected and try again.
Once the template is created import the OVF.
Check current hostname with the hostname command.
hostname
Change hostname with hostnamectl
hostnamectl set-hostname newhostname
Example:
Changing hostname from “localhost” to “newhost”.
[root@localhost ~]# hostname
localhost
[root@localhost ~]# hostnamectl set-hostname newhost
[root@localhost ~]# hostname
newhost
[root@localhost ~]#
Note:
- This is not a comprehensive guide, if you need more info, refer to the installation manual here.
- This assumes that all your partitions are going to be on one drive
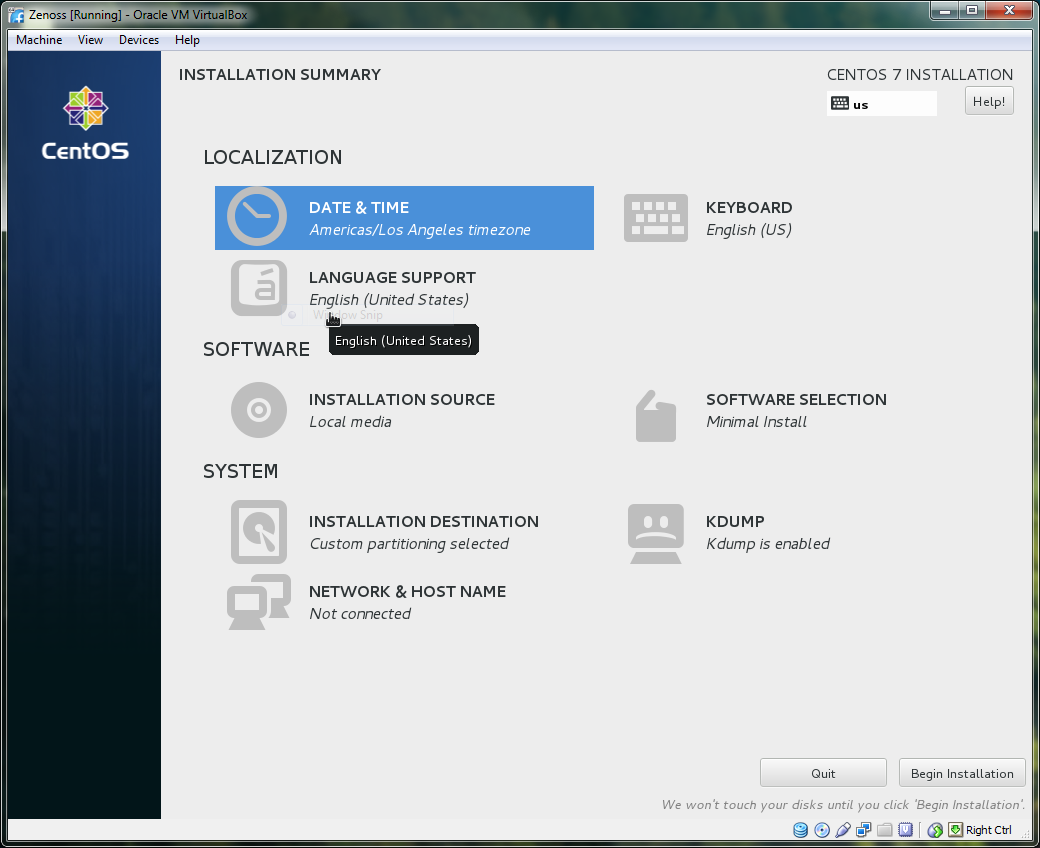
Installing CentOS 7
Note: If you have issues installing CentOS via the default install interface, try using the Fallback graphics mode, found in the Grub boot menu under “trubbleshooting”.
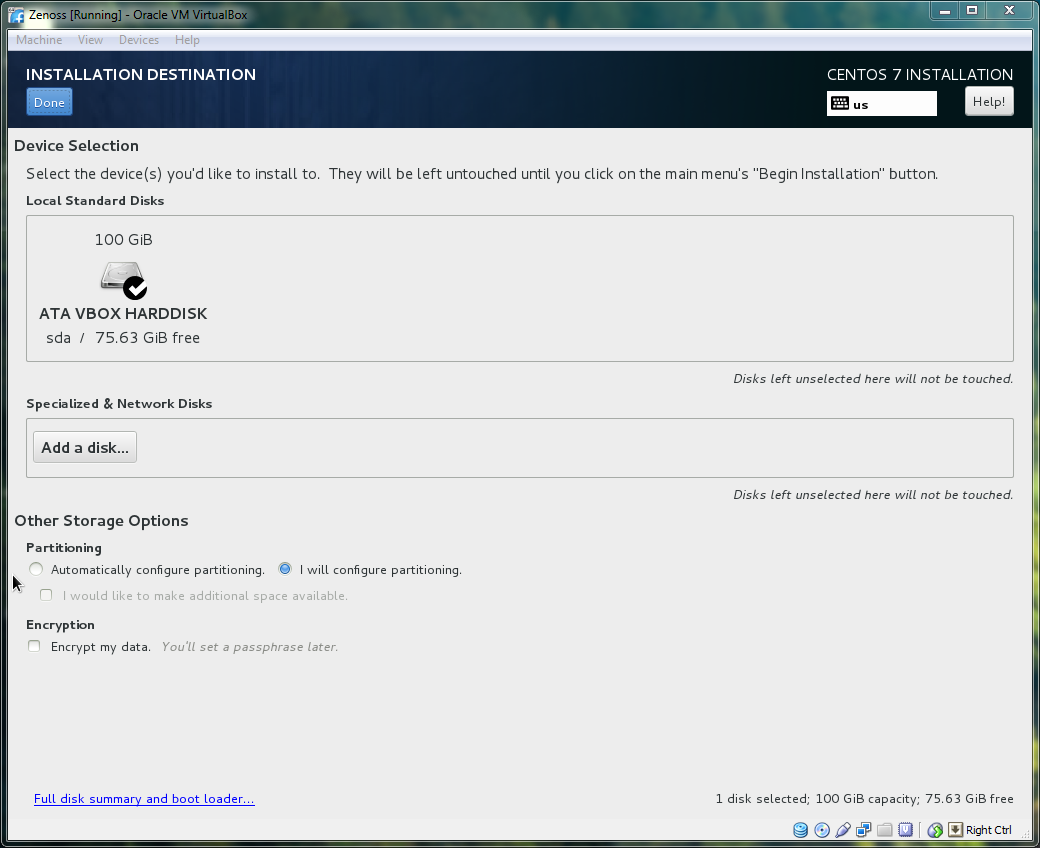
Install CentOS like you normally would, just be sure to leave at least 60GB of free space for Docker/Zenoss
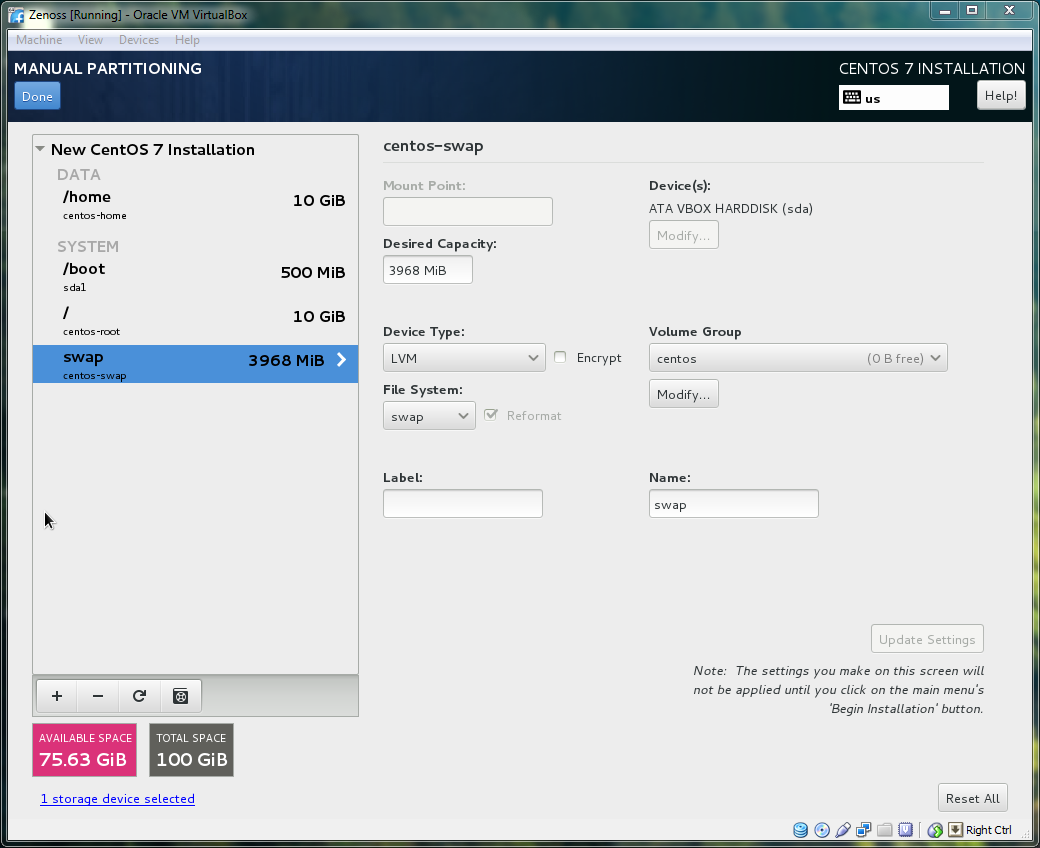
You can Select Automatic Partitioning, but you will need to make additional space available. I just configured it manually.
Note that I have about 75GB of free space, this will be used for “/var/lib/docker” and “/opt/serviced/var/volumes”. We’ll set these up later on.
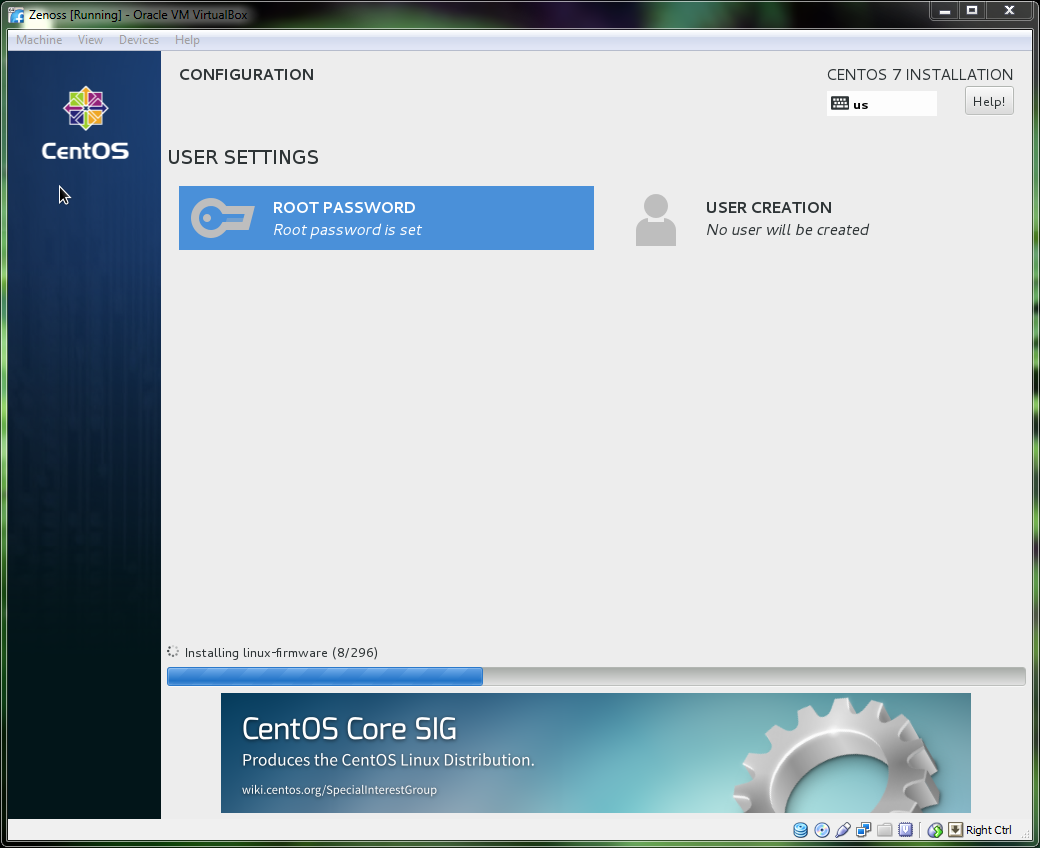
You don’t necessarily need to setup a user, but you can if you want to.
Once your finished reboot and login.
Setup network
You will need to setup your network settings. Refer to this post to set a static IP address if needed.
Note: In CentOS 7 ifconfig is not installed by default. If you need to check the IP address use the following command.
ip addr shAfter your connected to the internet you can install ifconfig with
yum install -y net-toolsSetup Hostname
Zenoss seems to have issues if you change the hostname after it is installed so be sure to set up the hostname before you start installing zenoss.
Check current hostname
hostnameChange the hostname. Replace “newhostname” with your new hostname.
hostnamectl set-hostname newhostnameAfter you finish configuring the hostname, add it to “/etc/hosts” with the following command. Change the IP address and the hostname “zenoss” to your systems IP address and hostname.
echo "192.168.56.101 zenoss" >> /etc/hostsUpdate your system
yum update -yDisable Firewall
systemctl stop firewalld && systemctl disable firewalldEnable persistent log storage
mkdir -p /var/log/journal && systemctl restart systemd-journaldCreate two Btrfs file systems
First create two normal linux partitions using your favorite disk utility. I am using cfdisk. Each partition should be over 30GB.
cfdisk /dev/sda
Create two Primary partitions and put them at the end and then write and exit.
Take note of the two new partitions names. Mine are “sda4” and “sda3”.
After the above changes are made, it would be a good idea to reboot the machine so the partition table can be updated.
rebootNow we will reformat the two partitions as Btrfs
Create mount point.
mkdir -p /var/lib/docker /opt/serviced/var/volumesChange “/dev/sda3” and “/dev/sda4” to your partitions names if they are different.
DOCKER_PART=/dev/sda3
APP_PART=/dev/sda4
mkfs -t btrfs --nodiscard $DOCKER_PART
mkfs -t btrfs --nodiscard $APP_PART
Add the new file systems to fstab, so they automatically mount on boot.
APP_PATH="/opt/serviced/var/volumes"
echo "$DOCKER_PART /var/lib/docker btrfs rw,noatime,nodatacow 0 0" >> /etc/fstab
echo "$APP_PART $APP_PATH btrfs rw,noatime,nodatacow 0 0" >> /etc/fstab
Mount the new filesystems, and make sure that they mounted
mount -a
if [[ `mount | egrep 'docker|serviced'` ]]; then echo "Mounted" ; else echo "Not Mounted" ; fi
You can manually check by running the following command.
mount | egrep 'docker|serviced'you should receive something like the following
/dev/sda3 on /var/lib/docker type btrfs (rw,noatime,seclabel,nodatasum,nodatacow,space_cache)
/dev/sda4 on /opt/serviced/var/volumes type btrfs (rw,noatime,seclabel,nodatasum,nodatacow,space_cache)
Disable SELinux
By default SELinux is installed and enabled. To disable SELinux either edit the config file “/etc/selinux/config” and change “SELINUX=enforcing” to “SELINUX=disabled”, or you can run the following command.
EXT=$(date +"%j-%H%M%S")
sudo sed -i.${EXT} -e 's/^SELINUX=.*/SELINUX=disabled/g' \
/etc/selinux/config && \
grep '^SELINUX=' /etc/selinux/config
Enable Dnsmasq
systemctl enable dnsmasq && systemctl start dnsmasqInstall and Configure NTP
yum install -y ntp && systemctl enable ntpdHave NTP start on system boot and then start NTP
echo "systemctl start ntpd" >> /etc/rc.d/rc.local
chmod +x /etc/rc.d/rc.local
systemctl start ntpd
Download and install the Zenoss repository
rpm -ivh http://get.zenoss.io/yum/zenoss-repo-1-1.x86_64.rpm
yum clean all
Final Reboot
reboot
Once your logged back into the system start installing zenoss
Install the Zenoss-core service and start docker
yum --enablerepo=zenoss-stable install -y zenoss-core-service
systemctl start docker
Add the Btrfs and DNS flags to the Docker startup options
Identify ip for docker
ip addr | grep -A 2 'docker0:' | grep inet
Add the docker startup options. Change the ip address if needed. It should match the one from the previous command.
echo 'DOCKER_OPTS="-s btrfs --dns=172.17.42.1"' >> /etc/sysconfig/docker
Change the volume type for application data
You can manually edit the serviced file “/etc/default/serviced” and change the variable “SERVICED_FS_TYPE” from “rsync” to “btrfs” or run the following command.
EXT=$(date +"%j-%H%M%S")
 sudo sed -i.${EXT} \
 -e 's|^#[^S]*\(SERVICED_FS_TYPE=\).*$|\1btrfs|' \
 /etc/default/serviced
Restart docker
systemctl stop docker && systemctl start docker
Start the control center
systemctl start serviced
you can monitor the process with
journalctl -u serviced -f
Serviced has about 5-10 minutes worth of work to do before you’ll be able to login to the Control Center interface. If the service fails to start, reboot the server.
Setting up name resolution
To setup name resolution on you local computer just add the following line to your “hosts” file. On Linux and OS X this is located in “/etc/hosts” On Windows machines it is under “\Windows\Sytem32\Drivers\etc\hosts”
192.168.56.101 hostname zenoss5.hostname hbase.hostname opentsdb.hostname rabbitmq.hostname
Be sure to change the IP address and “hostname” to the IP address and hostname of your server. You also might need administrative privileges to edit the hosts file.

Logging into the Control Center.
Now open up a web browser and go the following URL. Change the IP address to your servers IP.
https://192.168.56.101
Login with the Zenoss server root username and password. If you want to setup a user other then root, please refer to the Zenoss Installation guide here.

Change the hostname to your Zenoss server hostname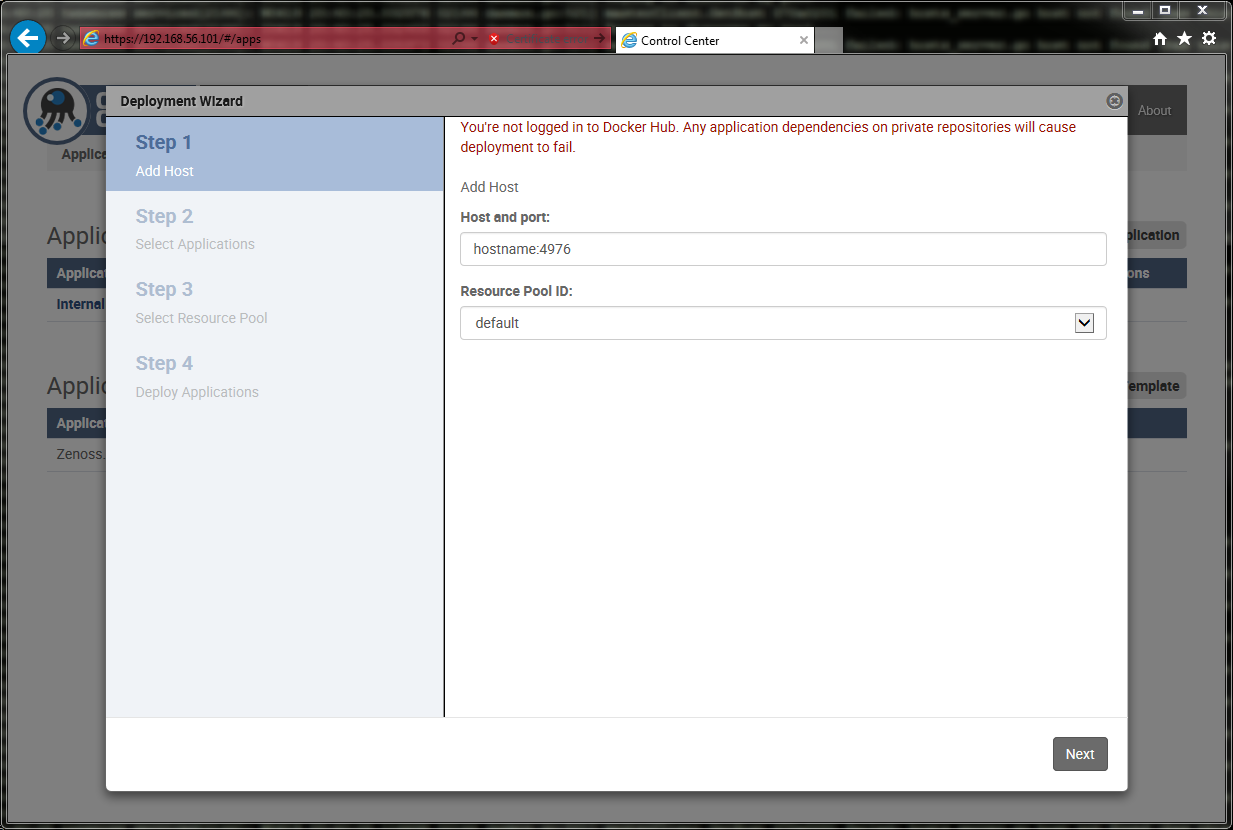
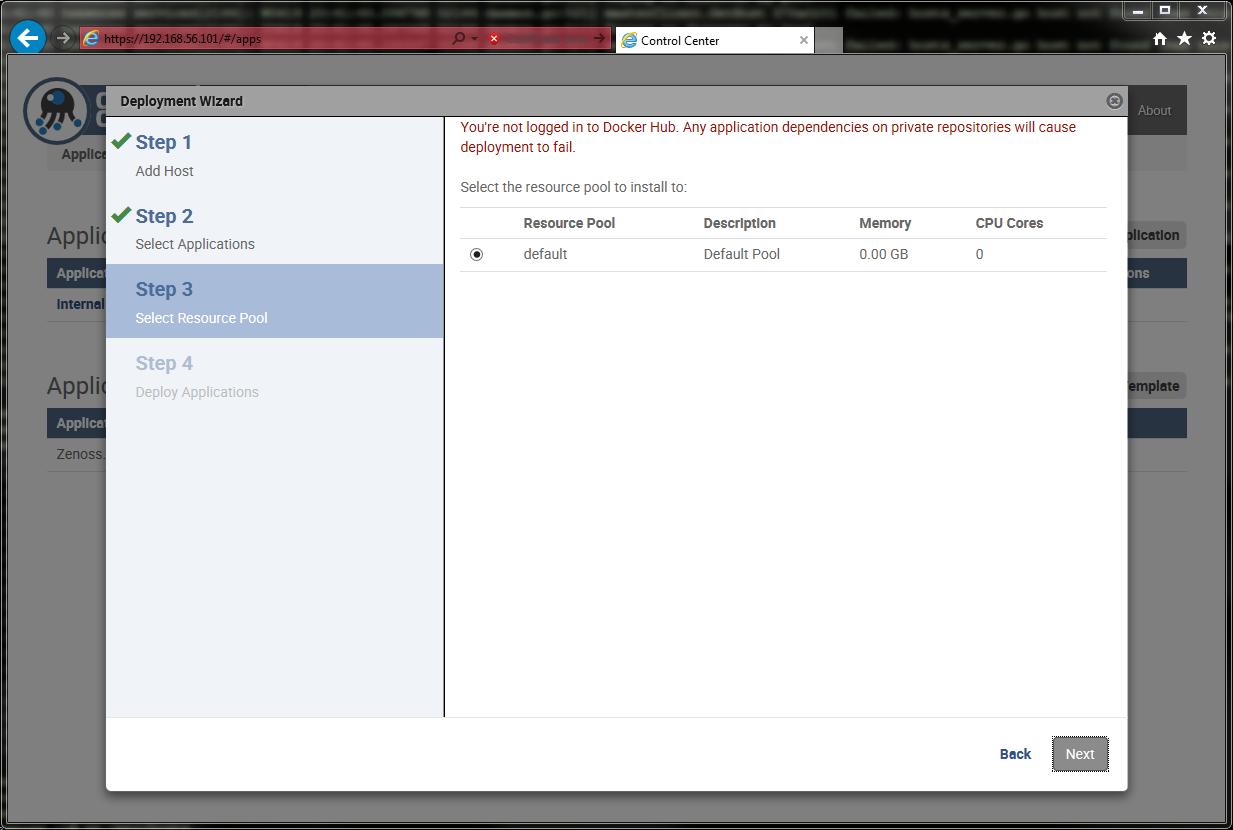
Select the check boxes in the next two steps.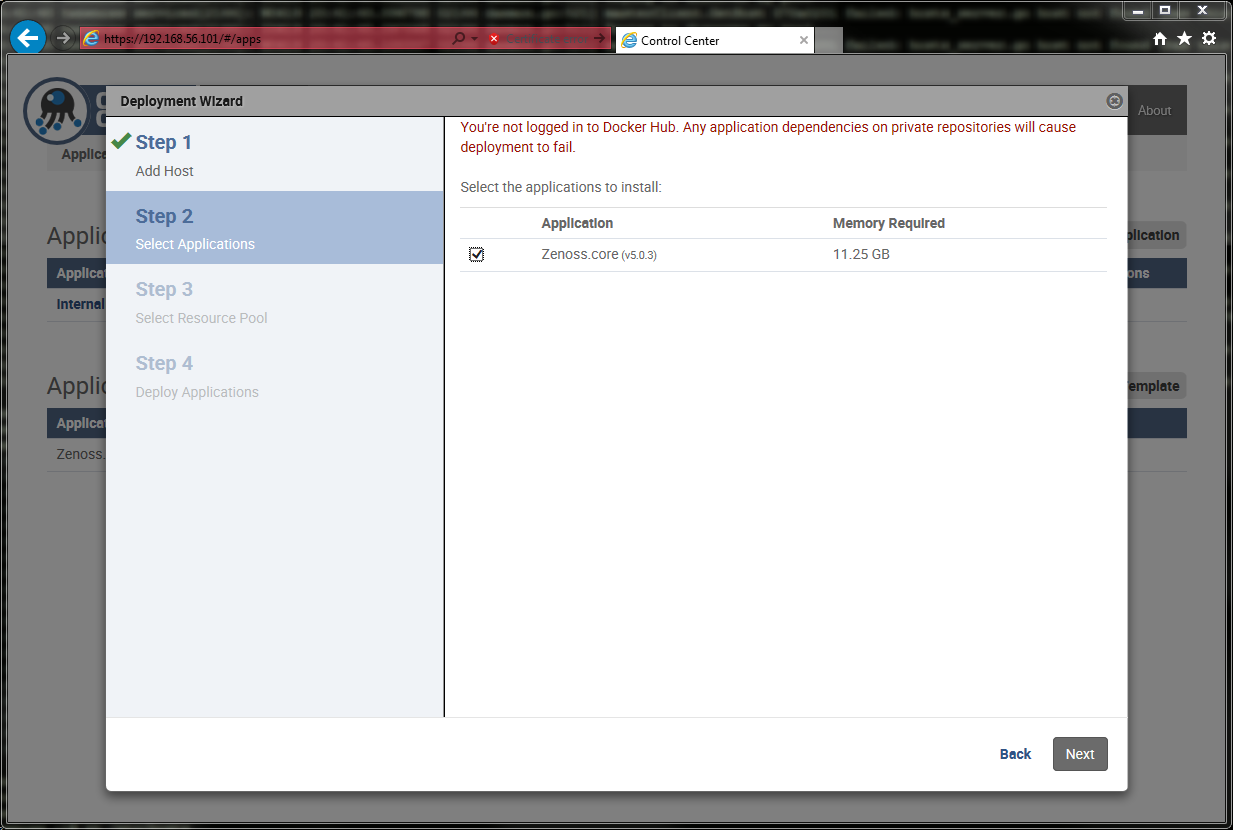
Give it a deployment id and deploy it.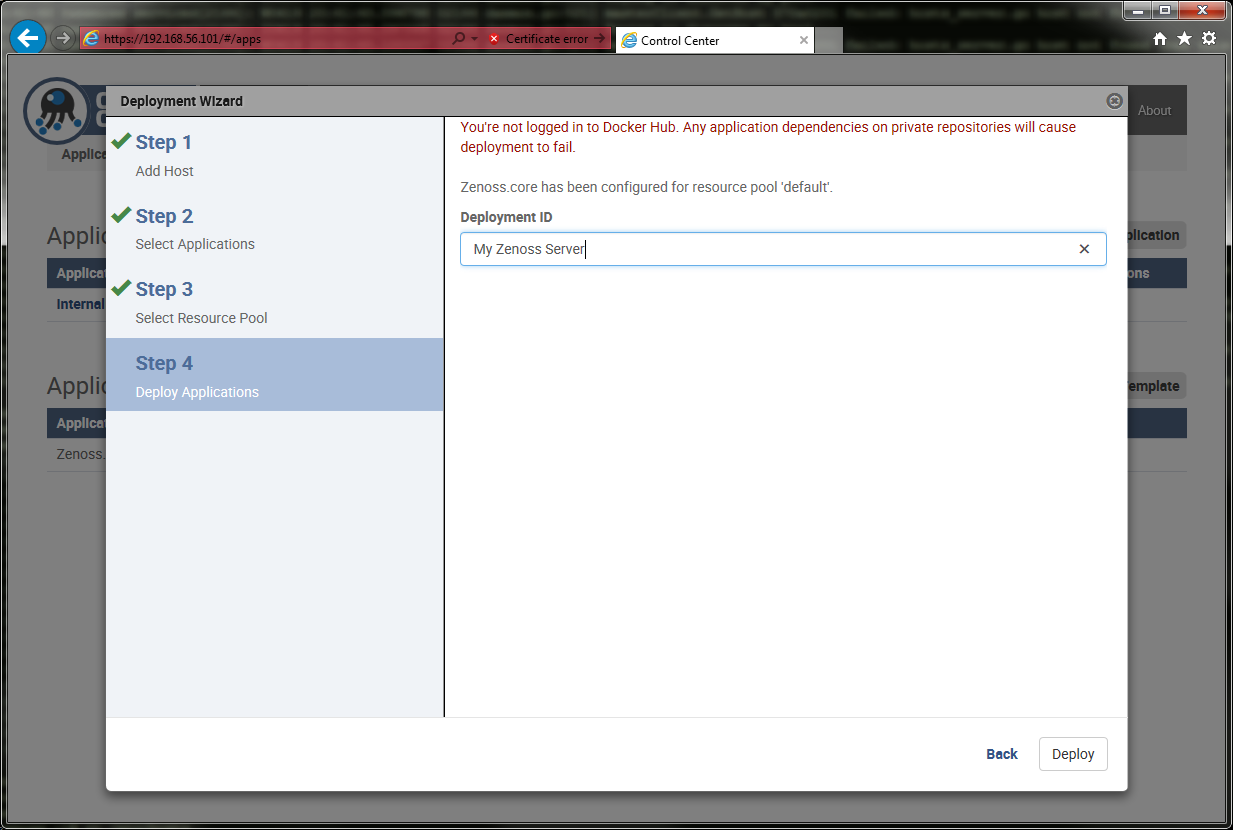
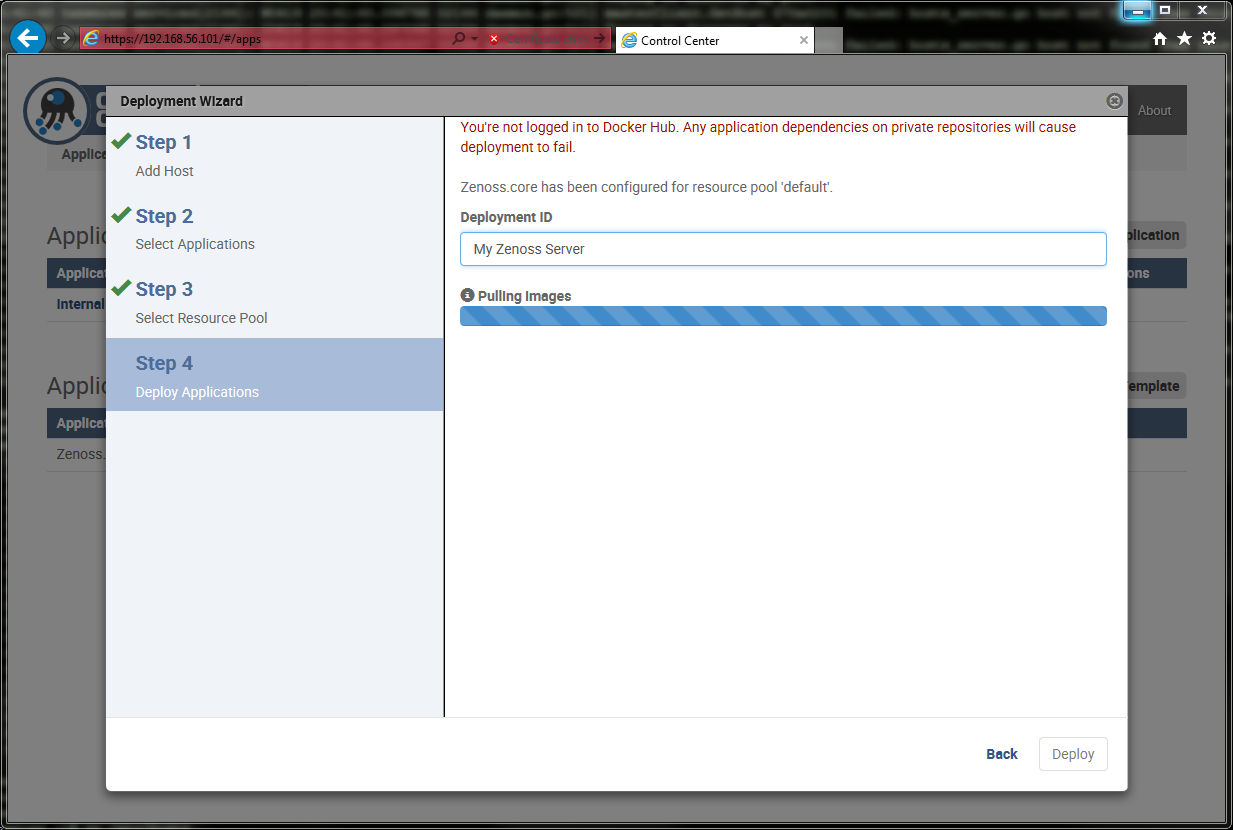
Once it is deployed Make sure that it is started. Once it finishes go log into Zenoss. It can take awhile for Zenoss to start up, depending on your hardware, so be patient.
The Direct URL for Zenoss is
https://zenoss5.hostname