Command from here
https://android.stackexchange.com/a/78183/239063
From a command line run
( printf "\x1f\x8b\x08\x00\x00\x00\x00\x00" ; tail -c +25 ~/Path/to/android_backup.ab ) | tar xfvz -

Command from here
https://android.stackexchange.com/a/78183/239063
From a command line run
( printf "\x1f\x8b\x08\x00\x00\x00\x00\x00" ; tail -c +25 ~/Path/to/android_backup.ab ) | tar xfvz -
https://stackoverflow.com/questions/18533567/how-to-extract-or-unpack-an-ab-file-android-backup-file
Install Android Backup Toolkit
wget https://downloads.sourceforge.net/project/adbextractor/android-backup-tookit-20180521.zip
unzip android-backup-tookit-20180521.zip
cd android-backup-tookit/android-backup-extractor/android-backup-extractor-20180521-bin
Unpack backup. Changes it from an ab to a tar file
java -jar abe.jar unpack ~/path/to/backup.ab ~/path/to/backup.tar
After thats complete, you can untar it. Change Desktop to the path you want to extract to.
tar -xvf ~/path/to/backup.tar -C ~/Desktop/
The -T option lets dmesg show user readable time.
Example:
$ dmesg -t
...
[Sat Nov 15 12:15:12 2019] CPU1: Package temperature/speed normal
[Sat Nov 15 12:14:12 2019] CPU3: Package temperature/speed normal
[Sat Nov 15 12:14:12 2019] CPU0: Package temperature/speed normal
[Sat Nov 15 12:14:12 2019] CPU4: Package temperature/speed normal
$
dmesg time options
$ dmesg -h | grep time
  -d, --show-delta            show time delta between printed messages
  -e, --reltime               show local time and time delta in readable format
  -T, --ctime                 show human-readable timestamp (may be inaccurate!)
  -t, --notime                don't show any timestamp with messages
      --time-format   show timestamp using the given format:
                                [delta|reltime|ctime|notime|iso]
Suspending/resume will make ctime and iso timestamps inaccurate.
Should be able to install with apt.
apt install -y golang go-dep
Print versions
$ dep version
dep:
  version     : devel
  build date  :
  git hash    :
  go version  : go1.8.3
  go compiler : gc
  platform    : linux/amd64
$ go version
go version go1.10.4 linux/amd64
https://github.com/xeals/signal-back
More information at the above link
wget https://github.com/xeals/signal-back/releases/download/v0.1.7-alpha.2/signal-back_linux_amd64
chmod +x signal-back_linux_amd64
./signal-back_linux_amd64
Help info
Usage: signal-back_linux_amd64 COMMAND [OPTION…] BACKUPFILE
   --help, -h     show help
   --version, -v  print the version
 Commands:
   format   Read and format the backup file
   analyse  Information about the backup file
   extract  Retrieve attachments from the backup
   check    Verify that a backup is readable
   help     Shows a list of commands or help for one command
Replace ~/Desktop/signal…backup with the path to your Signal backup.
./signal-back_linux_amd64 extract ~/Desktop/signal-2019-09-30-01-43-21.backupIt’ll ask for the password and then start pulling out the attachments and putting them in the current directory.
Default option is XML. CSV will let you open it up in Excel.
./signal-back_linux_amd64 format -f CSV --output signal-output.csv ~/Desktop/signal-2019-09-30-01-43-21.backup
Specify password to use
You can use the -p option to specify the password. It does not matter if there are spaces every 5 numbers or not. Also the -P option is suppose to let you use a file.
./signal-back_linux_amd64 extract -p "48294 55709 09123 94563 74662 12800" ~/Desktop/signal-2019-09-30-01-43-21.backupOther help options
bob@localhost:~/Downloads/signal-back$ ./signal-back_linux_amd64 help
 Usage: signal-back_linux_amd64 COMMAND [OPTION…] BACKUPFILE
 --help, -h     show help
   --version, -v  print the version
 Commands:
   format   Read and format the backup file
   analyse  Information about the backup file
   extract  Retrieve attachments from the backup
   check    Verify that a backup is readable
   help     Shows a list of commands or help for one command
bob@localhost:~/Downloads/signal-back$ ./signal-back_linux_amd64 help format
 Usage: signal-back_linux_amd64 format [OPTION…] BACKUPFILE
 Parse and transform the backup file into other formats.
 Valid formats include: CSV, XML, RAW.
 --format FORMAT, -f FORMAT  output the backup as FORMAT (default: "xml")
   --message TYPE, -m TYPE     format TYPE messages (default: "sms")
   --output FILE, -o FILE      write decrypted format to FILE
   --password PASS, -p PASS    use PASS as password for backup file
   --pwdfile FILE, -P FILE     read password from FILE
   --verbose, -v               enable verbose logging output
bob@localhost:~/Downloads/signal-back$ ./signal-back_linux_amd64 help extract
 Usage: signal-back_linux_amd64 extract [OPTION…] BACKUPFILE
 Decrypt files embedded in the backup.
 --outdir DIRECTORY, -o DIRECTORY  output attachments to DIRECTORY
   --password PASS, -p PASS          use PASS as password for backup file
   --pwdfile FILE, -P FILE           read password from FILE
   --verbose, -v                     enable verbose logging output
bob@localhost:~/Downloads/signal-back$
Basically count to 100 and perform an operation each time i increases.
for ((i=1; i<=100;i++))
do
  echo $i
done
for loop 1 liner
for ((i=1; i<=100;i++)) do echo $i ; done
Handy if you just want a script to run and repeat the same thing over and over again. Doesn't stop till you kill it.
while true
do
  echo "Repeat till infinity"
  sleep 1
done
The following will execute the loop as long as the command in the () returns true. Once it returns false, it'll stop the loop
while (fping incredigeek.com | grep alive);
do
  echo alive
  sleep 1
done
#!/bin/bash
array=(one two three)
echo "Printing first object in array."  #Replace 0 with the place number of the array item
echo ${array[0]}

echo ""

echo "Whole array"
echo ${array[*]}

echo ""

echo "Array indexes"
echo ${!array[*]}
Output
Printing first object in array.
one

Whole array
one two three

Array indexes
0 1 2
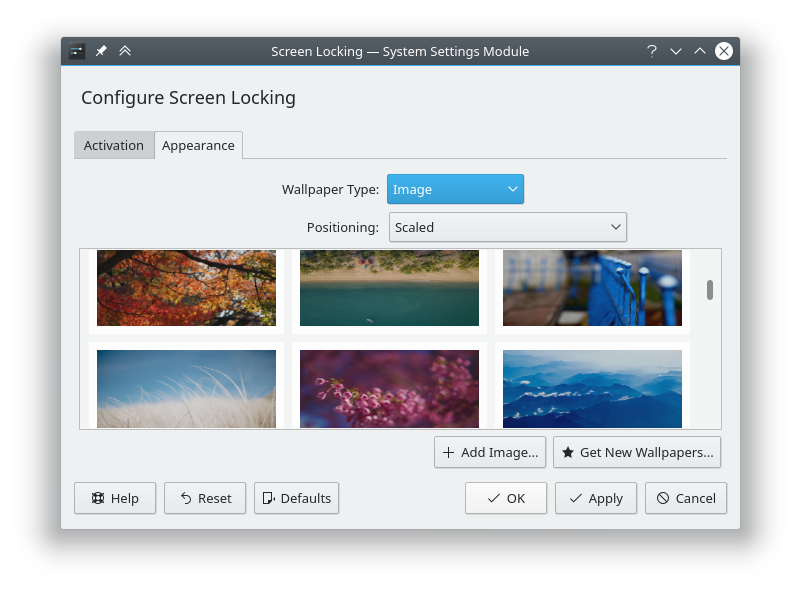
Install the KDE screenlocker config tool
apt install kde-config-screenlocker
Launch the utility with
kcmshell5 screenlocker
or search for screen locking in Application Launcher.
Set image under Appearance.
Gain access to radio via ssh
ssh ubnt@192.168.1.20
open up the /tmp/system.cfg
vi /tmp/system.cfg
Delete the following line. To move the cursor to the following line and type “dd” and vi will delete the whole line.
dhcpc.status=disabled
Add the following 5 lines. Hit “i” to enter vi insert mode.
br0 should be correct interface in most scenarios.
dhcpc.1.devname=br0
dhcpc.1.fallback=192.168.1.20
dhcpc.1.fallback_netmask=255.255.255.0
dhcpc.1.status=enabled
dhcpc.status=enabled
Save the file by hitting esc and then “:wq” followed by Return/Enter
Save the config changes and reboot the radio so it pulls an address.
/usr/etc/rc.d/rc.softrestart save && reboot
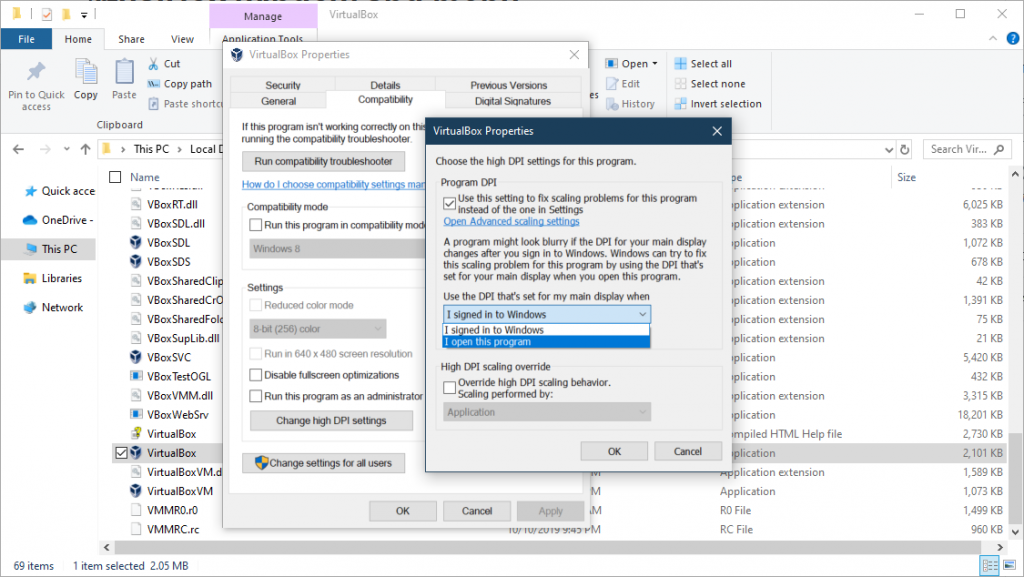
Sometimes the scaling can be wrong on a VM if you plug in a different monitor. You can fix the issue by opening up the location of the VirtualBox executable, right click on it, go to properties > Compatabiltiy > Enable Program DPI > Set to DPI to the Display of my main display when “I open this program”
Save by hitting OK
“C:\Program Files\Oracle\VirtualBox”