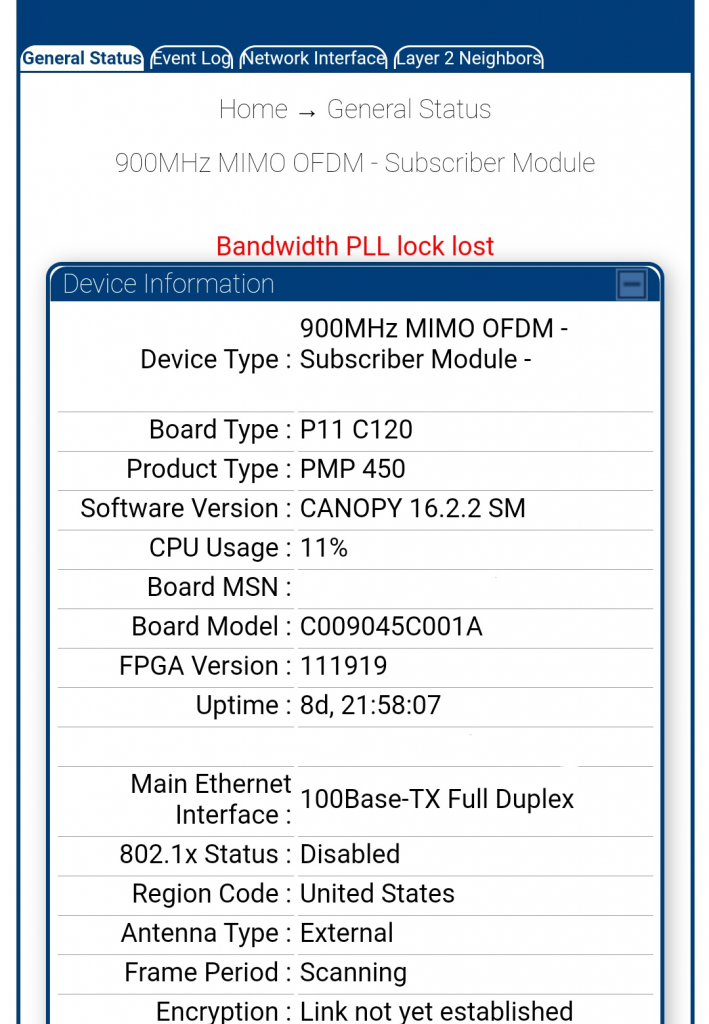
Had a radio briefly showing an error in red on the web page saying “Bandwidth PLL lock lost” The radio seems to operate so not sure if it is an actual issue or maybe an ongoing bug.
Started getting the following error while running ./validate.php for LibreNMS
Cannot load Zend OPcache - it was already loaded
Looks like the problem arises out of PHP trying to load two ini files for OPcache. Was trying to enable OPcache for LibreNMS so I created an opcache.ini file and put the settings in it. I missed the default 10-opcache.ini file.
Moving all the settings into the 10-opcache.ini file and deleting the created opcache.ini file resolved the issue for me.
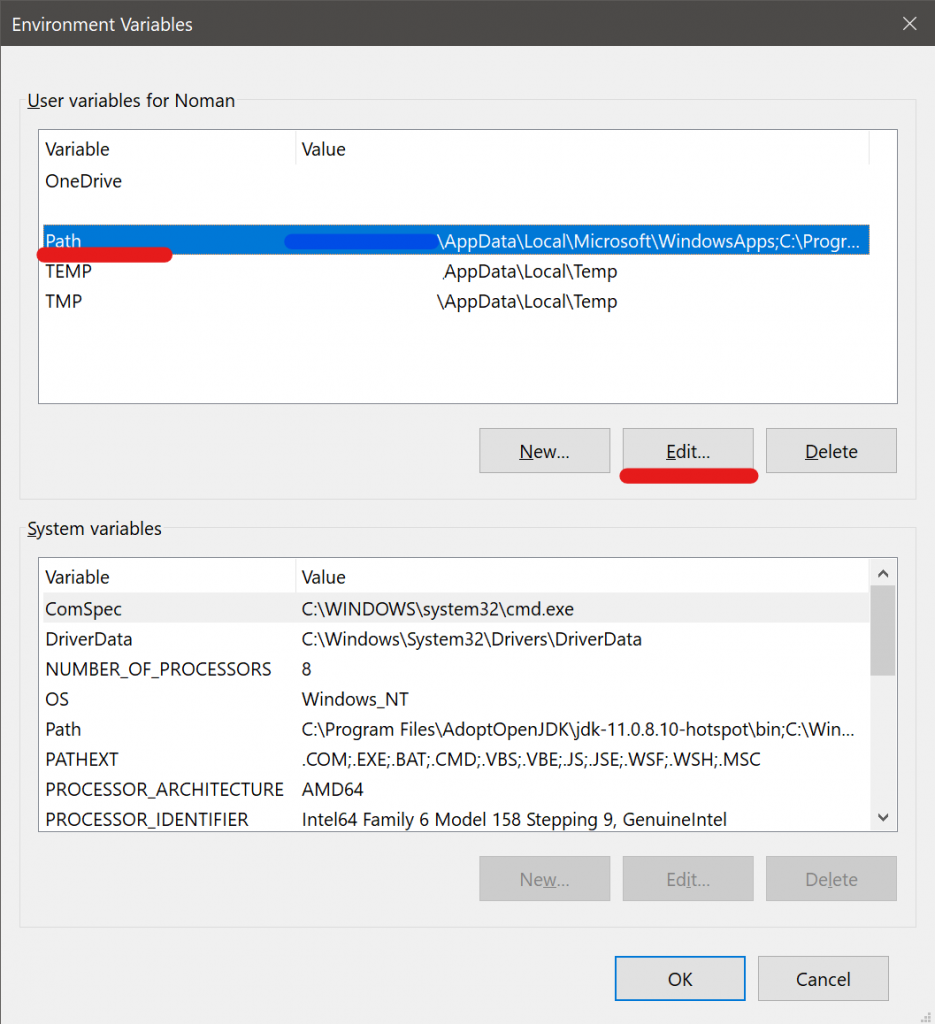
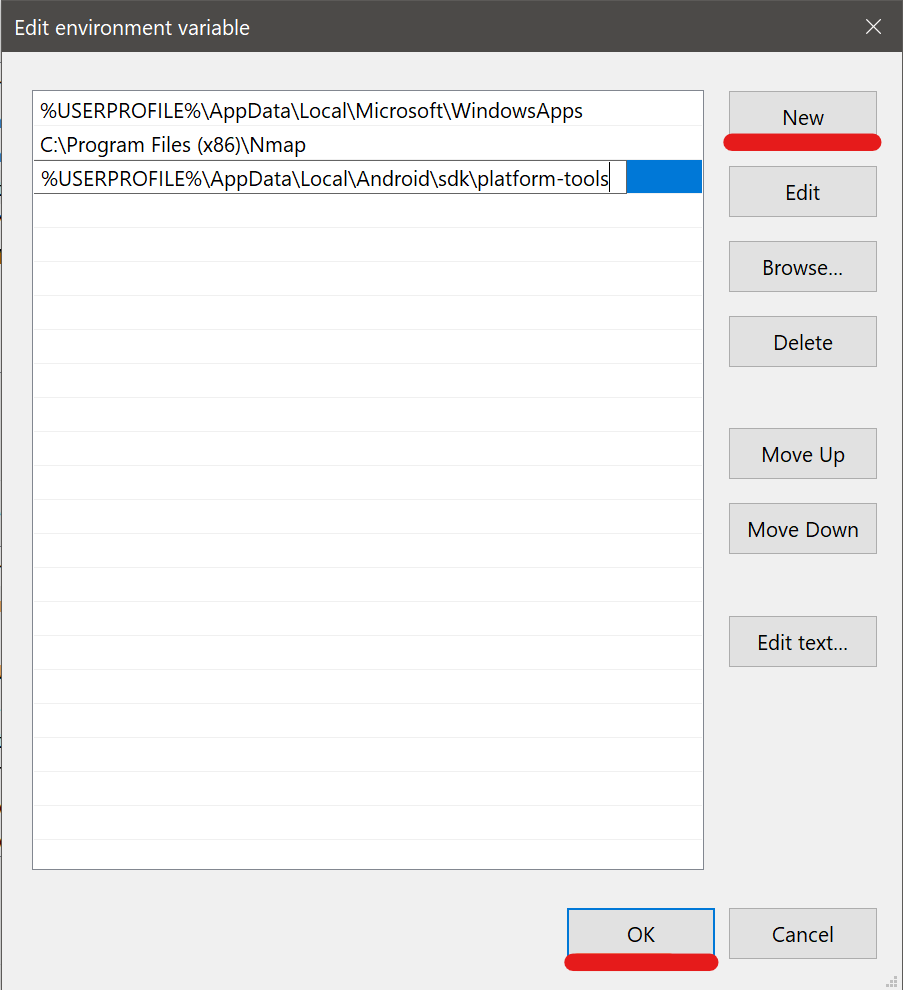
You should be good now. You’ll need to relaunch and Command Prompts you have open, but you should be able to run adb without having to navigate to the adb folder.
Recently upgraded a UniFi-Video VM by creating a new VM and restoring the backup from the previous one. There was a separate virtual disk used for storing all the videos. Although once I reattached it, I had to change the owner to the unifi-video user. lt was reporting that the owner/group was 127 and 134, looks like that was the user ID from the previous VM.
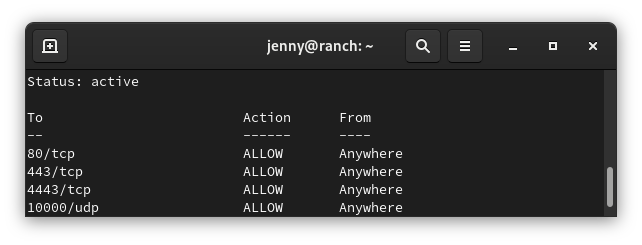
sudo ufw status numbered
Status: active
To            Action   From
--            ------   ----
[1] 3478/udp  ALLOW IN  Anywhere
[2] 5514/udp  ALLOW IN  Anywhere
[3] 8080/tcp  ALLOW IN  Anywhere
[4] 8443/tcp  ALLOW IN  Anywhere
[5] 8880/tcp  ALLOW IN  Anywhere
[6] 8843/tcp  ALLOW IN  Anywhere
[7] 6789/tcp  ALLOW IN  Anywhere
[8] 27117/tcp ALLOW IN  Anywhere
[9] 22/tcp    ALLOW IN  Anywhere
Delete rule
You need to know the number of the rule you want to delete. Replace number with the number of the rule from the status command
sudo ufw delete number
Reset rules
sudo ufw reset
Allow access to port from specific IP address
Example command allows access to SSH (port 22) from the 172.16.0.0/12 ip range.
sudo ufw allow proto tcp from 172.16.0.0/12 to any port 22
One note: It appears that you need to run the rule with every IP range you want to allow.
Allow access to port from all private IP ranges (RFC 1918)
If we wanted to allow SSH (port 22) from all local IP addresses, we would need to run the following three commands.
sudo ufw allow proto tcp from 10.0.0.0/8 to any port 22
sudo ufw allow proto tcp from 172.16.0.0/12 to any port 22
sudo ufw allow proto tcp from 192.168.0.0/16 to any port 22