There appears to be a bug on the UDM Pro that you can encounter while trying to update your WAN IP addresses. The error was similar to “Can’t change IP Address “PublicIP” used in Default Network”
It appears that the issue stems from the Internet Source IP being used in the LAN Network settings.
The way to work around this is to disable the Internet Source IP. However, this is greyed out which keeps us from making any changes. We can however use the Chrome Developer tools to get around this restriction.
Enable the Legacy Interface. UniFi Network Settings -> System -> Legacy Interface
Go to Settings -> Networks -> Edit (Select Default Network)
Open up the Dev tools with Ctrl + Shift + i and select Console
Paste the following in and hit enter
$$('[disabled]').forEach( a => a.disabled=false )
Enable Internet Source IP on UDM Pro
Find “Internet Source IP”, Disable and Save!
Swap back to the new user interface and go change the WAN IP address.
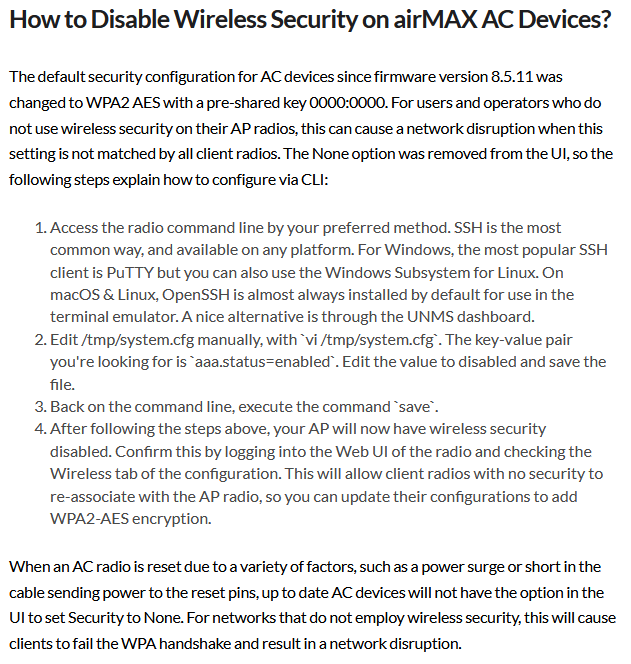
Included in the FAQ is a section on “How to Disable Wireless Security on airMAX AC Devices?”
The default security configuration for AC devices since firmware version 8.5.11 was changed to WPA2 AES with a pre-shared key 0000:0000.
Ubiquiti Default AC device WPA2 Preshared key
On Ubiquiti AC radios, you can not disable WPA 2 security through the web interface. This is not necessarily bad, however, what happens if you have a client that is reset and will only connect to the default ubnt SSID?
Fortunately there is a way to disable the WPA2 Preshared key.
Log into the device over ssh.
Run the following command to disable WPA2 in the config sed -i s/aaa.1.wpa.mode=2/aaa.1.wpa.mode=0/g /tmp/system.cfg
Save the config file with /usr/etc/rc.d/rc.softrestart save
Login to the client device and configure the SSID.
After you are done, you can click the enable button to re-enable Wireless Security.
Note: aaa.1.wpa.mode=2 doesn’t appear to be on all devices. If not, change “wpasupplicant.status=enabled” to “wpasupplicant.status=disabled”
Screenshot from UI help page on Wireless Security on airMAX AC devices
Most of the heavy lifting is done by the ubntmod.sh script. All you need is the IP addresses for the access points. The script will figure out the connected devices, reboot them first, then reboot the AP.
Here is a quick run down of the steps we need to perform.
Create list of AP’s and put them into an ap.lst file
Install ubntmod.sh script
Configure usernames and passwords to use with ubntmod.sh
Setup crontab to automatically run
Create list of AP’s and put them into an ap.lst file
This is really as simple as creating the ap.lst file and filling it with the access point IP addresses. One per line. The script uses wstalist to discover connected devices.
nano ap.lst
Install ubntmod.sh script
Installing the script is really hard. 2 lines to get setup.
Setup usernames and passwords to use with ubntmod.shd
When you first run ubntmod.sh without the -y option, it should prompt you to setup usernames and passwords to use. After this is setup, the script automatically reads from the config file for future use.
You can manually modify the ubntmod.conf file update any usernames or passwords.
It can be common for older devices to throw errors like the following when trying to ssh into them.
Unable to negotiate with 192.168.1.1 port 22: no matching key exchange method found. Their offer: diffie-hellman-group-exchange-sha1,diffie-hellman-group14-sha1
or
Unable to negotiate with 192.168.1.1 port 22: no matching host key type found. Their offer: ssh-rsa
The issue is that your version of SSH does not support those older, and most likely insecure, Key Exchange and Host Key algorithms types. The errors do give us enough info to add the right options to connect to the device.
No Matching Key Exchange Method Found
For the “no matching key exchange method found.” we need to manually add the KexAlgorithms option. KexAlgorithms means Key Exchange Algorithm.
While the UniFi controller is nice and everything, it does make it hard to see if a device is already adopted. At least if you have a ton of sites. Fortunately, we can search the database directly to find out if a UniFi is already adopted and which site it is assigned to.
Connect to Mongo DB
First we need to connect to MongoDB. And then we need to use the ace database.
mongo -port 27117
use ace
List all the devices on the controller
This command will list all the devices on the controller. Regardless of which site they are assigned to.
db.device.find({}, { site_id:"", ip : "", name :"", mac:""})
Some of the UniFi UNVR’s have system files on a USB drive. There seem to be a number of the drives failing recently, rendering the UNVR inoperable. Fortunately it is easy to replace. The following steps should preserve the video recordings.
Remove the USB drive (use a heat gun or screw driver to break the glue that is holding the USB drive)
Install new USB drive
Temporarily remove UNVR HDDs (this may not be necessary, but rather be safe then sorry.)
Boot UNVR with new USB drive. (Give it a little time to format and copy contents to the new USB drive. Should not take more then 30 minutes.)
Setup the UNVR like it was before
Power off the UNVR again
Reinstall the HDD’s
Power on the UNVR
Log in and reconfigure the users
Note on Recovery
You could potentially mount the failed or failing USB drive on a Linux machine copy off a UniFi backup. Unfortunately, the UniFi Protect backup does not preserve the users. Just the video groups. You will probably have to resend invites to users.
Note on the video storage drives
It sounds like the UniFi Protect system will try to read the drives and if it can preserve the data or read the raid information it will try to use that. That is what it sounds like at least from the forums. More info on drive management.
You will need a hash of the password to put into the database. We don’t cover that in this post. You could copy the password from a different user account or use a different UniFi instance to change the password and then check the DB to find the hash.
SSH into the UniFi Server
ssh unifiadmin@unifiserver
Connect to MongoDB
Connect to Mongo by typing in the following.
mongo -port 27117
Then select the ace database by typing
use ace
Find user ObjectId
The admins are in the admin collection/table. Use the following command to list all the users and their name, email, and password hash.
The following looks complex. Fortunately though you should be able to copy and paste. You should only need to change the – ObjectId to your User Id – Password Hash to your password hash
Manually adding the UniFi Protect self signed certificate can be helpful if you are accessing the controller over the local network. It has the benefit of letting your browser remember the password if wanted and not having to verify the certificate.
First we need to acquire the certificate.
Acquire UniFi Protect Certificate
In a Chrome based web browser, go to the IP address of the UniFi Protect NVR
Click in the URL bar where is says “Not secure” -> Certificate -> Details -> Copy to file
Follow the export Wizard. You can use the default settings.
Import Certificate
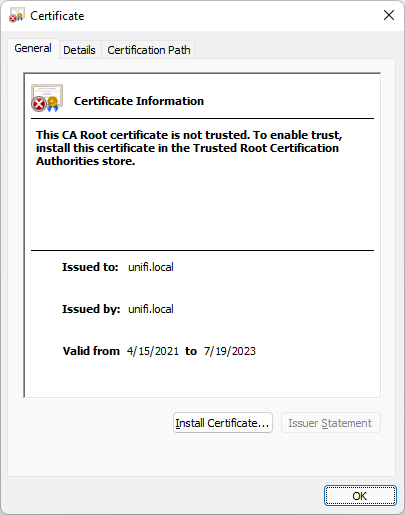
You can now import the certificate by double clicking on the cert.
Importing unifi.local cert
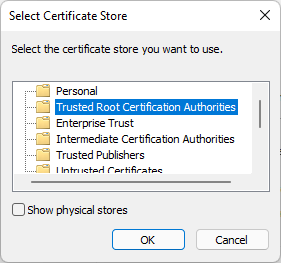
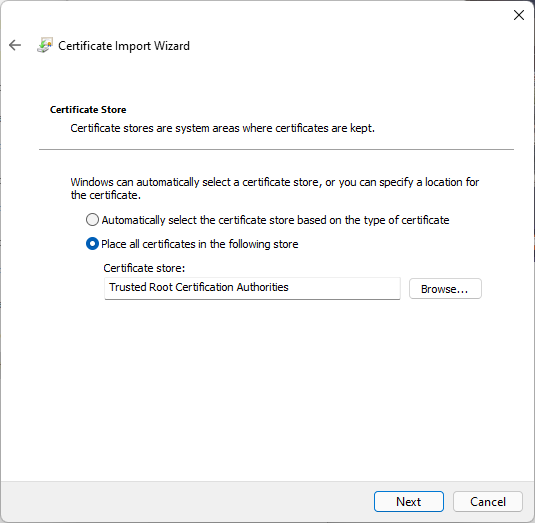
Note that it says to install the cert in the “Trusted Root Certification Authorities” store
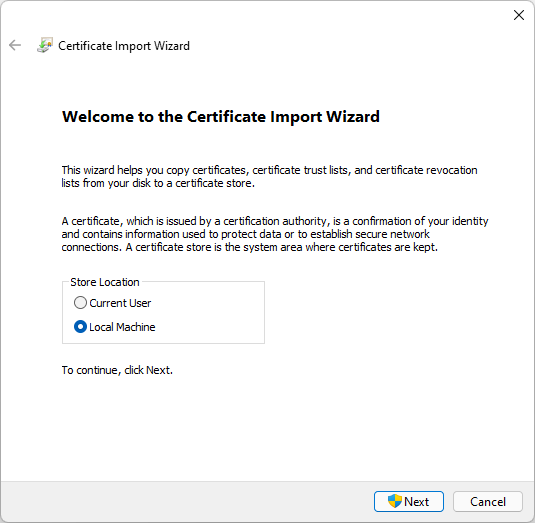
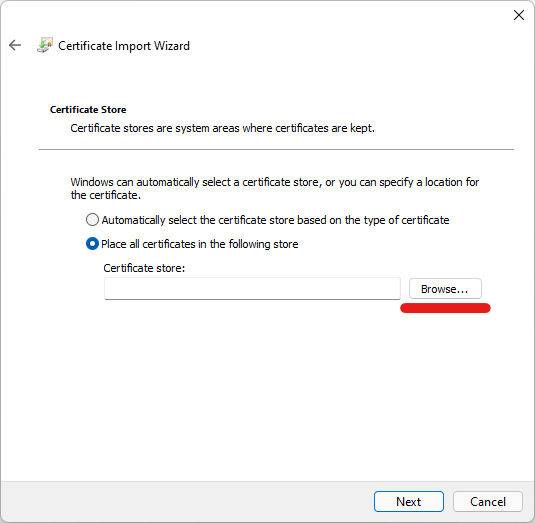
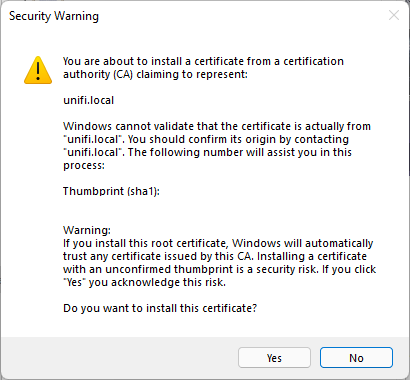
Import unifi.local cert select Local MachineBrowse for Certificate StoreSelect Trusted Root Certification AuthoritiesImporting unifi.local to the Trusted Root Certification AuthoritiesConfirm unifi.local certificate import
Now we can move on to Configuring the hosts file.
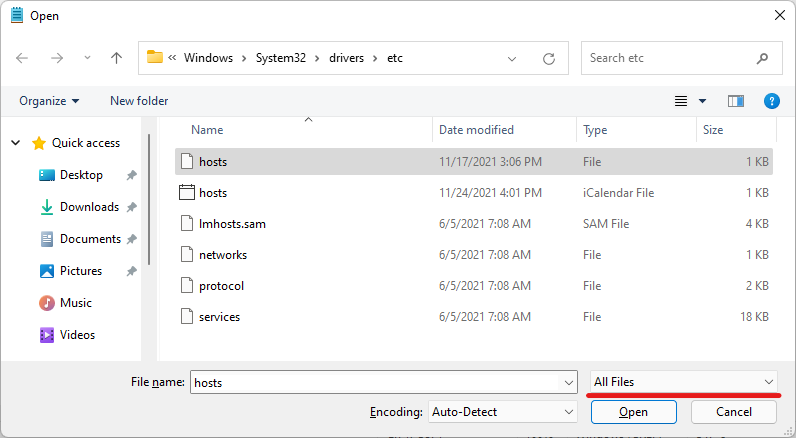
Add unifi.local to system hosts file
We need to add an entry for unifi.local as the cert if for unifi.local hostname and not the controllers IP address.
We’ll essentially be following the same steps outlined in the following post.
Now we can extract the zip archive. You can do this on Windows, macOS, or Linux through the GUI or you can extract with
sudo unzip autobackup_6.2.33.zip -d unifi
This will extract all the files and folders to a directory named unifi.
cd unifi
Dump database to JSON
You should now see the db.gz file. This is a compressed archive of the database in BSON (Binary JSON) format. We can use the mongo-tools to convert this to a more human readable JSON format.
sudo apt install mongo-tools
Now we can extract the archive and pipe it through bsondump.
gunzip -c db.gz | bsondump
You can run it through grep to filter out what you need.
You can also dump the db to a json file with
bsondump --bsonFile=db --outFile=db.json
More notes on the decrypt script.
The decrypt script is really simple. It looks like it uses a key to decrypt the UniFi backup and then puts all the contents into a zip file. There is also an encryption script. Theoretically you can decrypt, make changes to the config and then reencrypt and restore to a server.