CentOS/Fedora/RedHat
Add sudo privileges
usermod -a -G wheel LinuxUsername
remove
sudo deluser username wheel
Ubuntu/Debian
Add sudo privileges
usermod -a -G sudo LinuxUsername
remove
sudo deluser username sudo

CentOS/Fedora/RedHat
Add sudo privileges
usermod -a -G wheel LinuxUsername
remove
sudo deluser username wheel
Ubuntu/Debian
Add sudo privileges
usermod -a -G sudo LinuxUsername
remove
sudo deluser username sudo
Had an issue trying to recover from a failed upgrade. Apt would complain about dependencies, suggested running apt-get install -f.
Running apt-get install -f would still fail. It showed a conflict with the systemd1.service, ended up renaming the file with the following command
sudo mv /usr/share/dbus-1/system-service/org.freedesktop.systemd1.service{,bak}
and reran
sudo apt-get install -f
after that I was able to rerun the upgrade and finish
sudo apt-get upgrade
Easiest way is to use the Network Manager nmtui tool
nmtui
It gives you a “command line GUI” to search and select your preferred WiFi network.
Alternate way is to use the iw tools.
Scan for available WiFi networks
iwlist scan
Connect with iwconfig, replace WiFiName with your WiFi name. Note this only works with open networks.
iwconfig wlan0 essid WiFiName
You’ll need to get an address now, so run
dhclient
Check if your DNS is working. If not, as a “hack” manually add it to /etc/resolv.conf and restart the networking service.
sudo echo "nameserver 8.8.8.8" >> /etc/resolv.conf
sudo service networking restart
Your not supposed to manually put the nameservers in resolv.conf. But it works in a pinch.
sudo apt-get install build-essential make gcc g++
Other things to install
sudo apt-get install p7zip bzip2
Should be able to get all the dependencies for MXE in one go by running
sudo apt-get install -y autoconf automake bison make build-essential gcc g++ python intltool libgdk-pixbuf2.0-0 libtool-bin p7zip-full
Full requirements are listed at the following url.
https://mxe.cc/#requirements
In Ubuntu the simplest way to install the VMware tools is through apt.
sudo apt-get install open-vmware-tools
Shouldn’t have to do anything else.
You can also install the tools by hitting Install VMware tools from either the web UI, or vShpere. This will mount a virtual CD on the OS, you can then copy the contents to a local directory in the vm. You can then proceed to install them by extracting the tar file with
tar -xzf VMware*
cd into the new directory
cd vmware*
and run
sudo ./vmware-install.pl
Typically your RAID volumes will show up as /dev/mdXXX
If it is not, it could be because the device mapper module is not loaded. Load it by running the following command.
modprobe dm-modAs a side note you can list the block devices using
dmraid -bhttps://bbs.archlinux.org/viewtopic.php?id=42321
If your still having trouble you can try installing mdadm and dmraid
apt-get install -y dmraid mdadm
Don’t know if this is the recommended way to delete a user, but it seems to work.
sudo service snmpd stop
Open up the snmpd.conf file in /var/lib and find the line with the SNMP user and delete the line
sudo vi /var/lib/snmp/snmpd.conf
The above file may be in the following location on RPM based systems.
sudo vi /var/lib/net-snmp/snmpd.conf
Save, exit, and start snmpd
sudo service snmpd start
These steps work for Ubuntu, but should work for any Debain based distro as well as CentOS, Fedora, RedHat etc.
Dig is a DNS lookup utility. It is included in most Linux distributions by default, but if it isn’t you can easily install dig with the following command.
The dig utility is apart of the dnsutils package
sudo apt-get install dnsutils -y
After it is installed, we can verify that it is working with
dig -v
For more information on how to use dig, refer to the following link.
https://www.howtogeek.com/663056/how-to-use-the-dig-command-on-linux/
The following is copied and pasted from the dig man page.
NAME
dig - DNS lookup utility
SYNOPSIS
dig [@server] [-b address] [-c class] [-f filename] [-k filename] [-m] [-p port#] [-q name]
[-t type] [-v] [-x addr] [-y [hmac:]name:key] [[-4] | [-6]] [name] [type] [class]
[queryopt...]
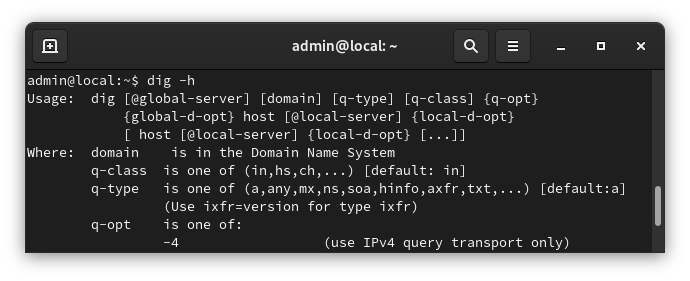
dig [-h]
dig [global-queryopt...] [query...]
DESCRIPTION
dig is a flexible tool for interrogating DNS name servers. It performs DNS lookups and
displays the answers that are returned from the name server(s) that were queried. Most DNS
administrators use dig to troubleshoot DNS problems because of its flexibility, ease of use
and clarity of output. Other lookup tools tend to have less functionality than dig.
Although dig is normally used with command-line arguments, it also has a batch mode of
operation for reading lookup requests from a file. A brief summary of its command-line
arguments and options is printed when the -h option is given. Unlike earlier versions, the
BIND 9 implementation of dig allows multiple lookups to be issued from the command line.
Unless it is told to query a specific name server, dig will try each of the servers listed
in /etc/resolv.conf. If no usable server addresses are found, dig will send the query to the
local host.
When no command line arguments or options are given, dig will perform an NS query for "."
(the root).
It is possible to set per-user defaults for dig via ${HOME}/.digrc. This file is read and
any options in it are applied before the command line arguments. The -r option disables this
feature, for scripts that need predictable behaviour.
The IN and CH class names overlap with the IN and CH top level domain names. Either use the
-t and -c options to specify the type and class, use the -q the specify the domain name, or
use "IN." and "CH." when looking up these top level domains.
SIMPLE USAGE
A typical invocation of dig looks like:
dig @server name type
where:
server
is the name or IP address of the name server to query. This can be an IPv4 address in
dotted-decimal notation or an IPv6 address in colon-delimited notation. When the
supplied server argument is a hostname, dig resolves that name before querying that name
server.
If no server argument is provided, dig consults /etc/resolv.conf; if an address is found
there, it queries the name server at that address. If either of the -4 or -6 options are
in use, then only addresses for the corresponding transport will be tried. If no usable
addresses are found, dig will send the query to the local host. The reply from the name
server that responds is displayed.
name
is the name of the resource record that is to be looked up.
type
indicates what type of query is required — ANY, A, MX, SIG, etc. type can be any valid
query type. If no type argument is supplied, dig will perform a lookup for an A record.
Firewalld
sudo firewall-cmd --zone=public --permanent --add-port=1714-1764/tcp
sudo firewall-cmd --zone=public --permanent --add-port=1714-1764/udp
sudo systemctl restart firewalld.service
UFW firewall
sudo ufw allow 1714:1764/udp
sudo ufw allow 1714:1764/tcp
sudo ufw reload
More information https://community.kde.org/KDEConnect