https://developer.android.com/things/hardware/wifi-adb
The following command will remove all saved networks from your Android Things devices.
adb shell am startservice -n com.google.wifisetup/.WifiSetupService -a WiFiSetupService.Reset

https://developer.android.com/things/hardware/wifi-adb
The following command will remove all saved networks from your Android Things devices.
adb shell am startservice -n com.google.wifisetup/.WifiSetupService -a WiFiSetupService.Reset
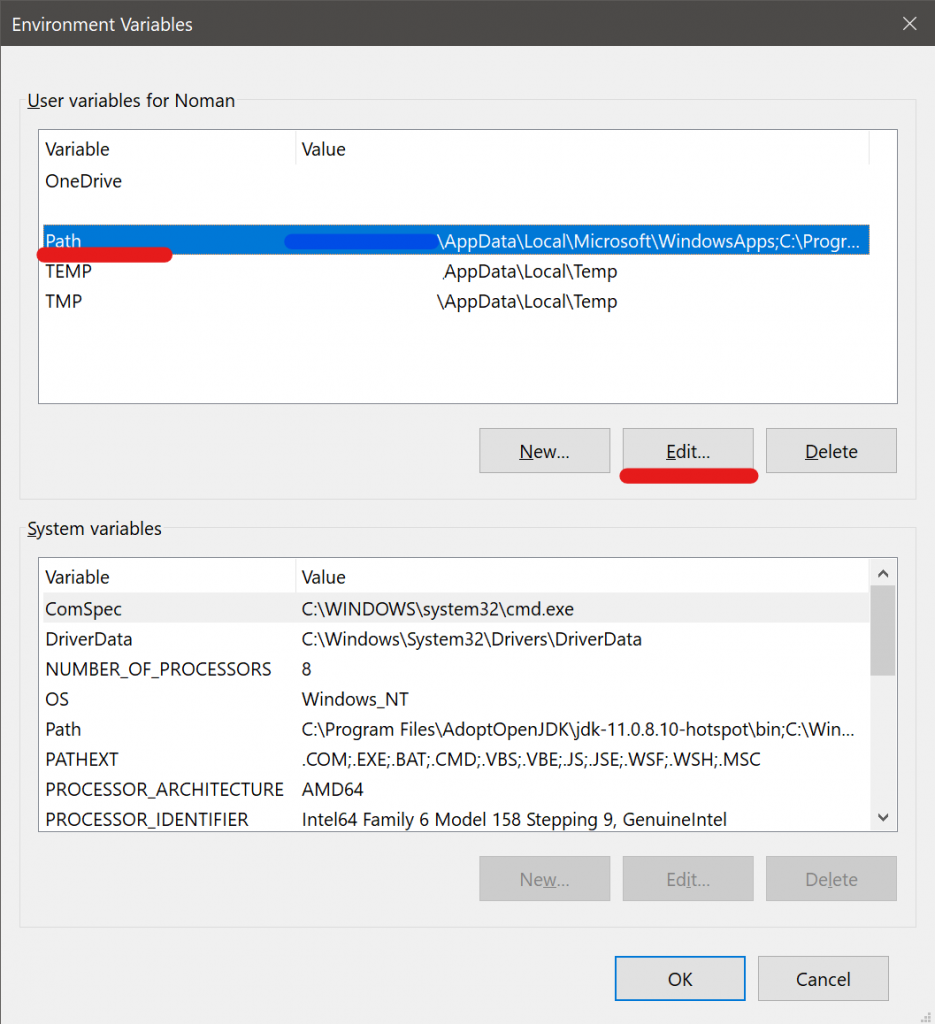
From the start menu search for “Edit environment variables for your account”
Click Path and then Edit.

Then click new and paste in the path to the ADB directory which should be
%USERPROFILE%\AppData\Local\Android\sdk\platform-toolsAnd hit OK

You should be good now. You’ll need to relaunch and Command Prompts you have open, but you should be able to run adb without having to navigate to the adb folder.
You need to use a Theme.AppCompat theme (or descendant) with this activity.
Looks like you can get the above error resolved by adding the following to the Android Manifest file.
android:theme="@style/Theme.AppCompat.Light

val textBoxVar: TextView = findViewById(R.id.textBoxID)
textBoxVar.text = "Hello World!"
val buttonVar: Button = findViewById(R.id.buttonID)
buttonVar.setOnClickListener {
    buttonVar.text = "Button Pushed..."  //Change text on button

}
val text = "Hello World! This is a toast message!"
val duration = Toast.LENGTH_SHORT
val toast = Toast.makeText(applicationContext, text, duration)
toast.show()
You’ll need to install and setup adb and then run the following commands. Change ipaddress to the ip address of the device running Android Things
adb connect ipaddress
adb root
adb remount
adb push bootanimation.zip /system/media/
adb reboot
bootanimation.zip will either need to be in the same directory as adb, or you can specify the path. For example if it is located on your Desktop you can use
For Windows
adb push \Users\username\Desktop\bootanimation.zip /system/media/
on Linux or MacOS
adb push ~/Desktop/bootanimation.zip /system/media/
https://developer.android.com/things/hardware/raspberrypi
Download the Console Tools from the following link. You will need to sign into your Google account.
https://partner.android.com/things/console/#/tools
Unzip the file and Launch the correct utility for your OS.
On Windows you will need to launch as administrator by right clicking on the Windows Application and Run as administrator.

The program is easy to follow along with and automatically downloads and creates the SD card for the Pi.
After you are finished, put the card in the Pi and boot it up.

You will need an Android Terminal. You can turn on the default one in the developer settings. Need to turn on developer mode?
You will also need to enable root which can also be done in the Developer settings
Open up the terminal app and run
su
rpi3-audio-jack.sh
More info here
Note: Some of these notes were saved in a draft and going off of memory. May not be entirely complete.
Basic steps to flash the factory Android image back onto a Google Pixel 1
You can download the full OTA image from
https://developers.google.com/android/ota
Go to https://twrp.me/Devices and download the correct version TWRP for your device.
Boot into boot loader menu
Plug you phone into a computer that has fastboot installed and run
sudo fastboot boot Downloads/twrp-3.3.0-0-sailfish.img
Note you may need to unlock your boot loader.
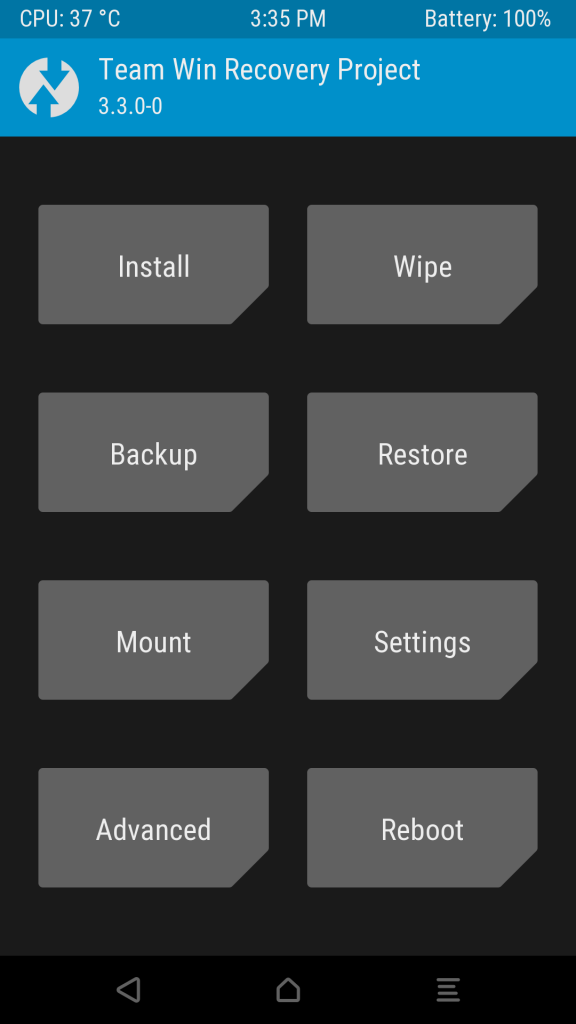
Your phone should now boot up into TWRP

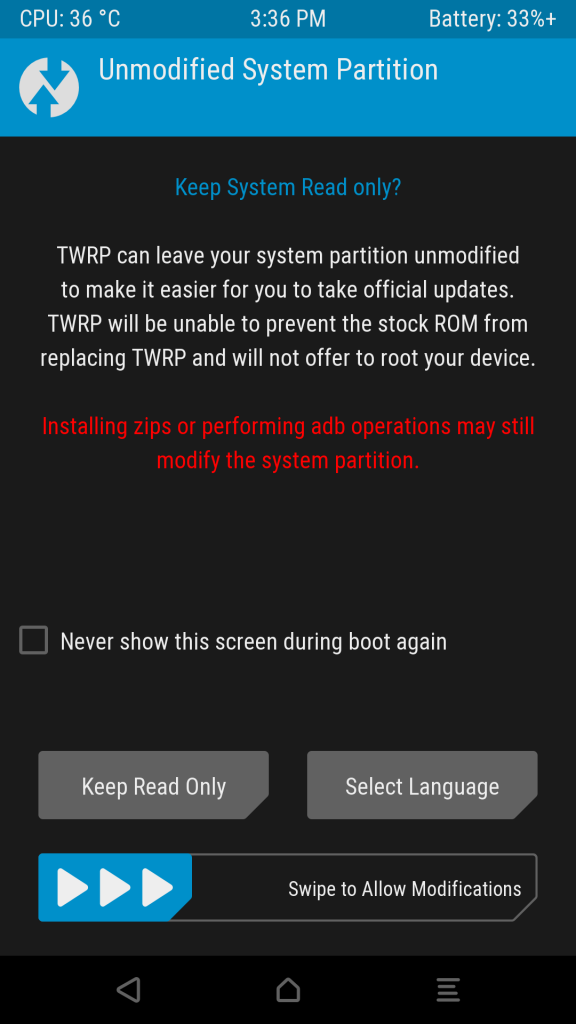
Swipe to Allow Modifications

Select advanced
Then hit ADB Sideload.
Swipe to start the sideload and then sideload from your computer
adb sideload image.zip
More detailed explaination
https://www.cyanogenmods.org/adb-sideload-twrp/
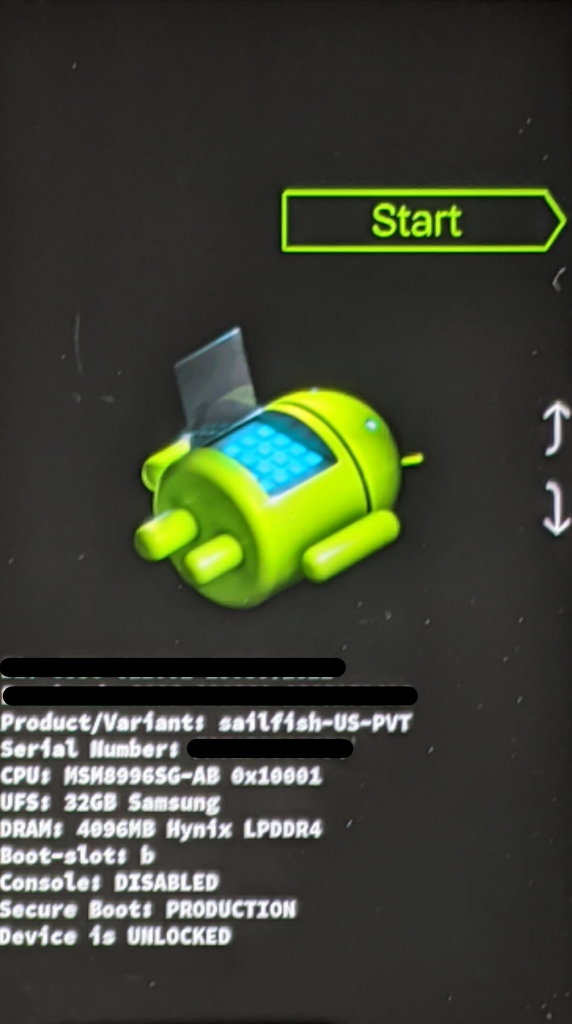
To boot up into the Android boot menu, start by powering down phone.
Once it is powered off, press the Volume Down and Power button and hold until it turns on.
You should get the boot menu.
